Ford Transit USA Forum banner

Travlin' Van Build

164K views 235 replies 49 participants last post by  Travlin  
#1 · (Edited by Moderator)
For a while I have been contemplating the perceived noise level in the van. It seems loud, but how loud, really? I found an App on the Play store called Sound Meter and put it on my phone. First, a baseline needed to be determined.

Here's a link to a chart of common db noise levels.

My Forester was what I was driving that day, so, I took a measurement in it traveling on the highway I take daily to/from work. With the cruise set at 80 on a posted 75 highway the Sound Meter read between 58 and 62 db. Averaging around 60-61 db.

This morning I take the van to work and repeat the experiment. In both cases I held the phone in my right hand, at a height about shoulder level and centered between the front seats and facing to the rear of the vehicle. Surprisingly, the Transit read almost exactly the same. Regardless of the accuracy of the Sound Meter the fact that the noise level measured identically on the same stretch of road wasn't what I was expecting.

For comparison, I'm seeing about 20 db ("leaves rustling" on the chart) sitting in my office at work, which seems to be on par based upon the chart. The 60 db reading in the vehicles is the level of conversational speech or the AC compressor running beside a house (from what distance the chart wasn't specific).

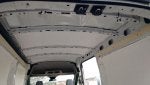
To me, it seems louder in the van, perhaps due to the cavernous aspect of the sound, but by the meter I'd say this is actually a fairly low reading. It was surprising how it was the same in both vehicles considering the Subaru has carpet, panels, and some sound deadening installed and the van is bare metal wall and ceiling in the cargo area with OEM floor and wheel covering.

Can it be made better? I think so, and will be working toward that end result as I begin my build by designing floor, walls and ceiling with this in mind.

Another thing done to the van is installation of a Masione Android 2DIN HU with the Metra Dask Kit. This is a Chinese HU running the Joying version of the Android OS. I've installed apps from the Google Play Store for Navigation, OBD2 monitoring, and will be evaluating these apps and others as I go. It is only playing in the front door speakers at this time, so the sound could be better and this is no fault of the unit, but of the OEM speakers and their placement.

Lastly, I've just installed a set of Cooper HT3 Discoverer tires in the OEM size. I like them and believe they are as quiet or quieter than the tires that were removed. They look better, to me, and have a blockier tread pattern that ought to serve traction well off pavement. As the van is unloaded I've set the front and rear tire pressure to the recommended pressure for the fronts.

Okay, that's it for now. More to come.
 
#2 · (Edited)
the van is pretty quiet usually, when the wind picks up and I am driving at 80 mph, yes, it is a little noisy, mostly wind noise,

I drive a chevy duramax diesel and that is loud in 2wd, in 4wd, I can't hear the radio cuz of the misaligned gears of the front diffy and tfr case.

So count your blessings and drive it bro :)
 
#4 ·
It's probably most accurate to measure one's own baseline and the effectiveness of any interventions afterwards. Comparisons among us may be limited - variations in road surface, tires, wind.

Not an expert on hearing (I could ask my ENT surgeon buddy) but the app says it measures sound pressure levels, not frequency based measurements like dBA or dBC. Not sure on how that matters but dBA reflects what you hear better than dB does (because frequency based measurement biased towards the human hearing range). Maybe that's why SPL in dB measured the same on the Forester and the Transit while you probably feel the Transit is noisier than the Forester?
 
#5 ·
There was no getting around the fact my Transit in its birthday suit was noisy on the highway.

By Hein's standards I went bughouse looney acoustically insulating mine. Noico, MLV, Thinsulate - I even put a layer of Thinsulate between the fender well and the front wheel well covers. My van is now 99% complete and I'm satisfied with the degree of quietness it has on the road. The biggest factor now in determining the noise level is the quality of the highway pavement. There is a stretch of brand new asphalt paving on I-5 that when you are on it the silence by comparison makes the rest of it sound like one has gone deaf.

* - In the past I posted about using contact cement to adhere leftover MLV to certain portions of the exterior bottom of the van's floor. Upon a return trip from Eugene yesterday when I went out to the van I noticed one of the slabs of it laying in the driveway. So much for that experiment. :(
 
#6 ·
* - In the past I posted about using contact cement to adhere leftover MLV to certain portions of the exterior bottom of the van's floor. Upon a return trip from Eugene yesterday when I went out to the van I noticed one of the slabs of it laying in the driveway. So much for that experiment. :(
Try another experiment; 3M 5200?
 
#8 ·
I wonder if a decibel reader can hear echoes? That's what I noticed on our first, pre-conversion ride. Echoes. Lots of echoes. I have driven other cargo vans, and the Transit is by far the quietest one I've ever driven. Once we added some sound deadener and carpet, the ride grew considerable quieter - on par with a mid-sized GM sedan? I'm sure it would be even quieter now that I have mattresses, duffel bags, etc inside - but as Stockrex says - there comes a point when the wind noise outside becomes apparent; and there's not much you can do about that.
 
#9 ·
Slowly moving along on the project, reaching Tabula Rasa today after removing the OEM floor cover. That was the easy part. Next was removing the shovel full of debris that had collected over a couple of years of plumbing service. Sweep, vacuum, sweep again, then mop, then hit all the corners with a small brush and a damp cloth.

After that I was in prime position to remove the (seemingly) gallon or so of spray lithium grease the previous party had felt needed to be sprayed on every surface related to the operation of the sliding door, and many surfaces that didn't. It had done what that white grease does best, congealed and collected dirt. The door operates quite a bit better now without the drag of that thick, dirt-encrusted layer of alleged lubricant where no lubricant is required.

Looking into the van from the rear it now looks reasonably pristine as long as you don't focus the gaze too closely. As for the OEM floor, after removing it I thought I'd roll it up until I needed it as a template and then found the pad was soaked in several places. Likely from something they spilled months ago which soaked into it like a sponge. It is now drying in my shop pad side up with the window AC removing the moisture and the ceiling fan to keep this dry air circulating.

Baby steps.
 
#10 · (Edited)
Today was a shopping day at Home Depot and Lowes, fortunately, they are across the highway from one another.

Three sheets of 11/32 Plywood, a 12 ft H-channel of white vinyl to connect the ply sections, and I'll be ordering 1 ft. planks of click flooring in Cork. With a 1/8" of acoustic underlayment with foil backing I'll have a floor. Underlayment/Plywood/Cork Click Flooring. The 23/64" thick Heritage Mill Cork Click Flooring at Home Depot in "Tea" color is getting the nod. Just have to consider any advantages to laying it N-S or E-W. Any experienced click floor installers speak up if something to consider comes to mind. Total floor thickness will be under 7/8" and maybe 3/8" or so higher than the OEM rubber and pad. Preserving the standover height in the MR was the goal.

Also picked up two 10' 1x4 and two 8' 1x3 whitewood boards that will be the foundation for my walls. Along with L-Track (US Cargo Control) bolted into the Van sheet metal over the 1x lumber at the mid and high flat spots that run the length of the wall. The L-Track will make the attach points for all cabinets and the 1x lumber will provide wood to screw into for the wall panels.

The wall panels will be 1/4" Luan cut to fit over the 1x lumber and between the upper and lower L-Track. R-Max 3/4" Polyiso will be glued to the back of the Luan, cut to fit perfectly between the upper and lower 1x boards. This way I won't have to deal with too many curves and such, and the large flat panels can be easily removed if/when needed.

On the sheet metal of the Van walls will be a layer of Thinsulate, 3M's CS150, from the garment industry. (Vogue Fabric) It is about a third the thickness of the SM600L, and rated R-1.7 instead of SM600L at R-5.2. On the Luan wall panel there will be another layer of CS150 opposite the R-Max on the living space side, to be covered in cloth or carpet or something.

Wall insulation will get R-3.4 from two layers of CS150 Thinsulate and R-5 from the R-Max for a total of R-8.4. I think the CS150 Thinsulate will provide lots of flexibility in installation as I can layer it as needed to add thermal or acoustic insulation. The cost is $0.40/ft.sq. , compared to $2.45/ft.sq. for the SM600L. Even after triple layering CS150 to match R-value of the SM600L the cost per foot square is less than half. The roll purchased is 60" wide and 75 feet long (375 ft.sq.) and costs $210.00 including shipping (so, $0.56/ft.sq. total). I'll have plenty to use elsewhere, like in the doors, roof, in a blackout curtain behind the seats, and covering bare metal in the living space, etc.

I'm pondering cutting it into strips and putting it in the valleys under the floor as the height of two layers will likely be a good match and Thinsulate's hydrophobic qualities could really shine in that application. After pulling the sopping wet OEM floor pad, my personal hydro-phloor-bia suddenly became more acute. I'll be thinking on a way to allow some airflow under the floor. I also picked up a rattle can of Rustoleum Gloss White Auto Finish paint and plan to hit all the tiny rust-looking spots found under the wet OEM floor with sander, then paint, before I cover it up.

The Steelcraft running boards are slated to arrive on Friday. So, naturally, we'll be seeing some most unusually cold weather this weekend, dropping below freezing in the wee hours. Actually, it should be pretty nice for most of the day, especially if I keep busy.
 
#11 · (Edited)
Installed the running boards today. Here's some shots, light wasn't too cooperative.

There is some adjustment on how far out you can put them. I lined the inside edge with the corner of the trim above it. It could be another inch, maybe two, farther inward. And a little more out as well. Installation was straight-forward. Wish they put the pictures on or near the page that references them. (I write instructions, so maybe I'm just sensitive) Other than this the detail was good.

Feels very sturdy, looks good too, and has great grip. Trying out the step into the slider and it makes it easy to get in now. The driver side should now give me a point in between so I won't roll off the seat and drop to the ground like I have been doing. Getting in is much easier, gonna have a simpler boarding strategy now.

Next, will be working on the floor, and adding the Weather Tech mud flaps up front.
 

Attachments

#12 · (Edited)
Added the Weather Tech front mud flaps (no-drill install) and they complement the running boards well. Should help keep them from accumulating stuff from the road that would only then be tracked into the cab. The install was super easy, except when I dropped the nut. No problem, just go get that handy magnet on a stick. WTF? Oh, Stainless Steel nut don't play well with magnet.

Next order of business was to cut the plywood for the floor. Test fitted it and took it out for later. Then, went to work on the cargo deck where metal shavings from upfitting had accumulated and turned into little rust spots. They sanded out easily, showing white paint underneath most of them, which was a relief.

There are several Rivnuts in the floor from upfitting and a couple of them were loose, so I snugged them up. The ones on the tops of the floor ridges where the bulkhead was mounted had rust, so were cleaned up. Once all this was done I rattle-canned these spots with Rustoleum Automotive Gloss White.

Then, I hear a clicking start somewhere in the dash. Sounded like a turn signal. It seems, despite having the ability to turn off the cargo lights with a timer, the battery had run down through the day with the doors open. I had started the engine this morning to turn the wheels for the mud flap install. No problem then. When I checked it showed just under 7 volts. I still can't figure out where under the hood I'm supposed to get a ground connection other than that tiny stud on the valve cover. Which is why I just dug deep to get directly to the battery. Thankful I had read about how to access it on the forum. I removed the two bolts from the seat base and excavated my way to the terminals to put a tender on it, as that is all the charger I have. We'll see how that goes. Looks like the OEM battery from 2015, so it is pushing three years old and might not care for this level of abuse.

Note to self: Install that switch on the Cargo light ground like so many have. Oh, and put a pigtail on for the Battery Tender.

Calling it a day.
 

Attachments

#15 ·
It may have gotten painted. Look for a hex or octagon shaped post at least 1/2" in diameter and at least and inch long. It very easily could be on the engine. It needs a firm base, and solid ground connection to the engine. Other than that I have no clue. I'm just going by what I've observed on other vehicles made to be used by people who are covered by OSHA.

The owner's manual may point out where to connect that ground clamp. I don't have a copy of that.
 
#18 ·
It may have gotten painted. Look for a hex or octagon shaped post at least 1/2" in diameter and at least and inch long.
Yeah, something of that diameter is what I was expecting. A point that the spring in a jumper clamp could get some bite into and which offers enough surface contact area to carry some current.

The 5mm or so diameter bolt provided, one of two cleverly hidden beneath unmarked rubber covers in that area, looked a little small for the job and I dismissed it out of hand. :(

Live and learn.
 
#23 · (Edited)
Got some quality time in today on the floor. Added underlayment to the plywood with 3M 90 and trimmed to fit.

Was planning on cutting strips of Thinsulate CS150 to fit in the valleys of the metal floor, then decided just to cut panels to cover the floor and lay the plywood underlayment on top. I measured the CS150 and once it relaxes it is 0.5 in. thick, so will fill the space in the valleys and be compressed on the ribs without adding a lot of altitude to the floor. Nor, putting me though the trouble of cutting all the strips.

At the second break in the ribs I strung a pull string for later use if I want to get some wires across, under the floor. I left a gap there in the CS150 to allow an easy pull.

The previous owner had upfitted, so there were eight Rivnuts in the floor that I drilled the plywood to use. I'll get some of the countersunk hex bolts on a trip to HD tomorrow that will set flush with the ply.

With no floor I measured sound at different speeds and got 45 mph - 67db; 55 - 74db; 70 - 80db. This was using the Sound Analyzer app on an Android phone, set to LCF.
After installing the floor and wheelwell covers it read 55 mph - 69db; and 70 - 76db. I could tell the difference. Looking forward to seeing the readings once I have the walls and ceiling insulated.

Here's pics from today. Some may notice the windshield screen moved from overhead to storing it behind the passenger seat utilizing a velcro edged fabric panel that came with the van.
 

Attachments

#24 ·
Battery Update

Installed the WalMart replacement battery today. Everything went smoothly on that front. Upon starting the engine and turning on the radio in the Android HU I was a bit shocked to see that it had lost the station programming. Everything else, app-wise, was as I had left it. Oh well not sure whose brilliant idea that was to leave stations in volatile memory for that app.

After putting some miles on it today the MPG seems to be reading a little better economy. Being disconnected from the battery likely reset things so it is now mapping anew, based upon my driving style, which is probably quite a change from urban plumbing truck to rural covered wagon. It had been reading around 16.3 fairly consistently before. After about fifty miles today it has been climbing and was reading 18 when I parked it this evening.
 
#26 · (Edited)
Another great day for van work.

Have installed L-Track on 1x4 and put 1x3 strips up high on both sides. After seeing the OEM bolts I decided not to put L-Track on the high pieces and drilled the 1x3 for access to these anchor points on both sides. 5 on the driver side, 3 on the passenger side. Should be more than adequate for overhead storage or whatever I may need to attach. Some of the L-Track bolts required using a coat hanger and Elmer's Wood glue to put the nut on the back side of several of the harder to reach attach points. There are a couple of washers lost in the voids now. I don't expect to lose much sleep over them.

Once done with that I started the insulation project. Working with the Thinsulate CS150 was a breeze. Doing the lower parts of the walls first, attaching with adhesive when needed, then moving to the large panels. In most places I have two layers of CS150, providing R-3.4, which will be behind Polyiso with an additional R-5. Some final Thinsulate left to do tomorrow, then the R-Max Polyiso will be cut to fit between the upper and lower wood strips. Wood and Polyiso both being 3/4" should flush out nicely.

This will be covered with 1/4" Luan. (I have a stack of it left over from a 5th-wheel make-over that died a horrible death fifteen years ago) Bought some Danish Oil to finish the Luan, but long term plan is to add some fabric over another layer of Thinsulate CS150 to the side panels. I'm really liking how the CS150 lets me use just what I need by layering.

Did the ceiling in its first layer of Thinsulate CS150, will probably add a second layer (R-1.7/ layer) and then either 1/2" or 3/4" R-Max Polyiso, and finish with Luan. Left the rearmost 2 panels uninsulated for now. Plan to shoot some temp readings tomorrow to see what one layer does, then repeat as I add layers.

Before spraying the 3M 90 adhesive on the ceiling I decided to relocate the wiring for the front pair of cargo lights. I'll need to get some photos, but what I did was cut the wire loom loose from the ceiling cross member, then fished it inside that cross member to the two light locations. (still leaving them unplugged for now, at least until I get a switch installed) I repurposed one of the rubber grommets on that loom to protect the loom at the new point it is entering the cross member.

Here's today's photos:
 

Attachments

#27 ·
Regarding the H-channel between the plywood sheets, it didn't work out. The 11/32" ply was too big for the 1/4" channel. I didn't have a big enough hammer to make it work.

The eight bolt holes left from the upfitting that came with the van now have stainless flat head screws tying the front and middle plywood panels down. Except for one hole where the Rivnut was damaged and now the bolt is stuck and the Rivnut is spinning. Gonna spend some special time under the van with some vice grips tomorrow. Hopefully I can get to that side of it without having to take other stuff apart.
 
#28 ·
Just ordered your running boards :)
I'm looking forward to your floor installation. I was originally going to keep the factory vinyl/insulation, but after a similar issue with the wet pad I've been thinking about taking it all out and using cork too. I'm 5'11" so also trying to keep as much interior height as possible. Are you planning on attaching anything to the floor or using the L-track exclusively?
 
#30 ·
Today I was burning some time off, lest I lose it. Got some of the R-Max installed and got a photo of the cargo light wiring change.

The R-Max went in well, friction fit at this point. After a fifty mile drive there wasn't a squeak to be heard. Should that change I have a backup plan.

During the drive I was astonished how much quieter it is. The CS150 has done an amazing job of reducing the rumble.

Measured the sound levels:
45mph 57 db
65mph 65 db
75mph 71 db

I'm pretty sure the van is now less noisy than my Subaru Forester. And, I still have the cab overhead and all doors to install Thinsulate in.

Now to plan out the Cork click-lock floating floor for plank placement to minimize waste and avoid adjacent seam alignments. Gonna have to put my thinking cap on for this.

Okay, here's today's Kodak moments ...
 

Attachments

#32 ·
I gave it a go, but the temps were mild. I had been working with the doors open and a breeze blowing in the slider and out the back.

Shooting the uncovered panel on the sliding door (where the window is on vans so equipped) as it was facing South at mid day, this showed 101 degrees F, and shooting Thinsulate covered panels (one layer of CS150) on the same side registered in the mid 80's. But, so did shooting metal framework that wasn't in direct sunlight. This temp was slightly higher than the ambient temp. I suppose that is what I should expect to see, the insulation not allowing heat gain. If so, yippie!

I'm trying to devise a method to take readings that would return conclusive data. Just need to work out parameters that will show useful results.
 
#33 ·
  • Like
Reactions: DaveJ
#35 · (Edited)
T- after doing a all your homework and a great job, you think there is any truth to the following link of R-38?
...or is this something I am being mislead by being rated at 80 degrees?
http://www.transitaccessories.com/insulation.php
Well, I don't see any reference to data supporting the claim. It reminds me somewhat of the foil-coated insulation claims to high R values. Once you read the fine print on those products you find that the test that generated the result was installing it between two 2x6 rafters with some minimum number of inches of air space (4"?) unattainable in a van install. Without this airspace their R-5 claims go down to R-1.

They put that reference to 80 degrees in the description of that product for a reason. Whatever that reason is wasn't further explained.

Another problem I have with their claim is the fact that they aren't covering the ribs with anything. Yet, I've seen photos of someone's build, maybe Antoine's, on a cold morning with condensation on the outside of the van except where the ribs are attached. Yeah, here's the photo from the FarOutVan website.

Image


Heat from the warm inside air was being conducted out from the van through the metal ribs into the outside panels. Only the places with condensation represent the insulated parts. Based on what Antoine discovered my build will cover any ribs left exposed with one layer of CS150, or at the very least some fabric or indoor/outdoor carpet to put something that prevents or slows conducting of heat through the metal between the air in the living space and the panels outside.

Granted, reefer vans can be created by spraying thick enough foam, and with refrigeration units can sustain sub-zero temps. The R value on those might be pretty high, but they cover every surface inside the cargo area. I've read of people buying used reefer trucks to convert to RVs who are thrilled with the results. But, to have that level of insulation installed probably isn't cost effective for an application that isn't making a profit enough to justify the expense.

Lastly, for most van builds what added benefit would R-38 offer to someone who is not using AC? All we need insulation for is to prevent heat from the outside panels increasing the inside temperature above ambient (and vice-versa in cold environments). At best, with fan ventilation, the temp will be about the same as under a shade tree in the heat. In the cold all that is needed is to retain heat inside in order to minimize use of the heat source of choice. R-5 might be a reasonable value to aim for in a temperate climate. Higher levels are gravy, or necessary for a lot of cold weather camping in those places where it could be more useful.

Not saying the claim is a lie, but it isn't the whole truth either. It is a bold statement and I'm suspicious enough to want to know more about the specifics of the tests that determined this number before I'd throw that kind of money at it.

I'm aiming to have R-8 in the walls and R-10 in the ceiling for roughly $320.00. This includes Thinsulate CS150 (375 ft.sq.) with shipping costs ($210.00), 3 panels of 3/4" R-Max ($45.00) and 2 panels of 1" R-Max ($40.00), plus 2 cans of 3M 90 spray adhesive ($25.00).

I don't know if this covers the question, but that is the way I'd look at it. This sounds more like the seller misunderstood after being told it would provide R-3.8 and misquoted it as R-38.
 
#41 ·
Thanks Orton!

The Electrowarmth T36 12 Volt Sleeping Pad is available on Amazon. But, I'm not linking it because of the stupid way this site displays Amazon links. Just search using the bit in bold.

I've purchased and have yet to install a Noco Genius GCP1 Plug port, likely to be installed in the rear bumper trim or beside the hitch wiring connections. Very stealthy either way. An idea copied from another forum member's contribution.
Image


This will be the Stage 1 Electrical setup, connected to a charger/inverter and a house battery in the van. (still studying options for this) It could be plugged it in at home to keep the house battery topped off. Eventually will integrate this as part of a more complex solar charging system as Stage 2.

The goal of this Stage 1 Electrical build will be to provide options for using RV park hookups or battery / inverter to power things when weekend camping. Heat, cooking, CPAP, LED lighting, etc. are the initial loads expected.

Fortunately I have a background in electronics, which only means that I'm suited to understand the enormity of the myriad options available to choose from to accomplish this, and, how to calculate the loads to determine the spec for the components. Thankful for all the info here from those who have been down this path.
 
#45 · (Edited)
So...I looked up 3M, found this product inquiry site;
http://solutions.3m.com/wps/portal/3M/en_US/3M-Company/Information/ContactUs/
...and asked:
"Hello-
I am a member of a RV Campervan forum; specifically the FORD Transit Van (http://www.fordtransitusaforum.com/). For winter/summer recreactional use, insulating a van is a must. Besides common house-building materials that some use it has been found that your Thinsulate products are utilized also by the 'van-crowd' to obtain an habitable environment including below freezing. I wish to inquire which of the two stated above 3M products (CS150 & SM600) performs superior to the other in such an application: R-rating. This includes the ability to multi-layer CS150 as it is thinner than one application of SM600. Now, I don't want to be difficult but I would greatly appreciate the name, if not at least the title, of the representative you assign this task. If at all easier I be happy to contact them by phone given the permission. While one product, if I am correct here, is more for a clothing application and the other for sound, insulation properties exist for both and it is this; which of the two is the preferred product to insulate a 'cargo van' in order to obtain the highest R-rating possible, and how to go about achieving this R-rating, I wish to be made aware of also."
Thank you,
HS
Email Confirmation-SENT
 
#47 ·
Stuck a Cork in it

A Cork floor that is.

It was a steep learning curve for me, having no prior experience with click-lock floating floor installation. Finally figured out how putting a little wood glue film in the click channels gave it enough resistance to prevent already connected pieces from dislodging when adding new planks. The job isn't perfect, though the oopses are all on the edges and will be covered by other things. There's enough cork left to finish out the Slider entrance and I'm cogitatin' upon a strategy to approach this "next step." har har

Overall, a WIN for team Vanderloosed! :D

For those who measure a job this way, I polished off un Modelo Especial and two slices of deep dish Sicilian pizza upon completion. So, this was an international effort!

Now off to Home Depot for some step trim and a few other things.
 

Attachments

#50 ·
Looks great! Are you planning on mounting any cabinets you install to the wood studs you installed or to the metal of the body?

-Chris


A Cork floor that is.

It was a steep learning curve for me, having no prior experience with click-lock floating floor installation. Finally figured out how putting a little wood glue film in the click channels gave it enough resistance to prevent already connected pieces from dislodging when adding new planks. The job isn't perfect, though the oopses are all on the edges and will be covered by other things. There's enough cork left to finish out the Slider entrance and I'm cogitatin' upon a strategy to approach this "next step." har har

Overall, a WIN for team Vanderloosed! :D

For those who measure a job this way, I polished off un Modelo Especial and two slices of deep dish Sicilian pizza upon completion. So, this was an international effort!

Now off to Home Depot for some step trim and a few other things.
 
#48 ·
Hi Travlin, I'm very interested in cork, read WN1A http://www.fordtransitusaforum.com/484666-post7.html
comment about using it. Last night went to Lowes but they only had 1 sample to look at. USFloors Natural Cork. Called Green Homes of Seattle where he bought his and the lady there also recommended Marmoleum but I'm leaning towards straight cork.
I have a medium roof van also, 130wb and would like to know what you put on under the cork.
Thanks!!!
 
#49 · (Edited)
Hi Travlin, I'm very interested in cork, read WN1A http://www.fordtransitusaforum.com/484666-post7.html
comment about using it. Last night went to Lowes but they only had 1 sample to look at. USFloors Natural Cork. Called Green Homes of Seattle where he bought his and the lady there also recommended Marmoleum but I'm leaning towards straight cork.
I have a medium roof van also, 130wb and would like to know what you put on under the cork.
Thanks!!!
I bought the Heritage Mill flooring from Home Depot and it includes a built-in cork underlayment. So, cork on both sides, which I liked because of the added acoustic and thermal insulation it provided. Found the Tea color on sale and three boxes was enough to do the 148" with just enough left over. I think the total with tax was under $150. It looks a lot better in person than their website photo. I was able to get a sample from the store.

Unlike WN1A, I added another layer of plywood (11/32) over the ribs. His idea of filling the valleys and just laying the cork floor would have probably worked fine and afforded a little more headroom.
 
#52 ·
One small step for a van, one giant leap for Vanderloosed

Finished the last remaining details on the floor install today. Came out looking pretty spiffy I think.

The Rear threshold is a 3/4" board cut to fit, drilled for spare crank and attachment screws, sanded, and wiped down with Danish Oil. As is the Luan back board on the slider step, also finished with Danish Oil.

Here's the pics. 'cuz it did happen. (Took a lot longer than anticipated) Dos Modelo Especial were required. May become three here shortly.
 

Attachments

#53 ·
Finished the last remaining details on the floor install today. Came out looking pretty spiffy I think.

The Rear threshold is a 3/4" board cut to fit, drilled for spare crank and attachment screws, sanded, and wiped down with Danish Oil. As is the Luan back board on the slider step, also finished with Danish Oil.

Here's the pics. 'cuz it did happen. (Took a lot longer than anticipated) Dos Modelo Especial were required. May become three here shortly.
Looks great! How's the diffence in sound?