Sixteen weeks ago I started with an empty van and a head full of ideas. Today, my Swiss-army-knife daily driver, stand-up touring camper, and multi-purpose hauler is about 95% complete.
It has been a most enjoyable project. I have worked on it virtually every day since December 01, 2015, except for the 18 days my new Transit was undergoing extensive warranty repairs.
The build took about 12 weeks and cost $2,457 in materials (that's about US$1700). That includes a third AGM battery, a 1000w PSW inverter, all cables and wiring, a Whynter 45 qt freezer/fridge, a Dometic portable toilet, a third automotive lounge seat, a queen mattress, a NOCO Genius 7200 battery charger, and all the miscellaneous materials, fasteners, paint, and hardware.
Most of the cabinetry and furnishings are of refinished solid oak, and oak veneer plywood. I was very lucky that some good friends alerted me to a take-away-please furniture give-away at a neighbor's driveway.
KEY FEATURES - Touring for Two
We were unable to find the combination of features we wanted in the resale market. So, encouraged by many on this Forum, I custom ordered a Transit, finalized my design, and built exactly the conversion I wanted.
It is compact and simple. The short 130” wheelbase was predetermined by daily driving needs and small city living. We wanted front and rear door camping access, a full queen bed, a fridge, a portable toilet, a simple water supply, comfortable lounge seating, mountain bike stored inside, flexibility for hauling, and a nice airy feel inside.
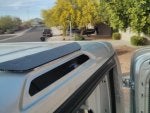
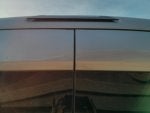
I did not want a propane based system or exterior waste tanks, nor did I want generators or gas cans, or even a solar system. I also wanted to avoid sheet metal cutouts on my van. Through careful compromising, I think we ended up with most of what we wanted!
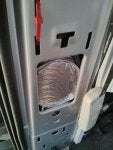
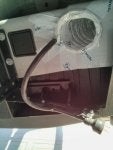
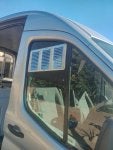
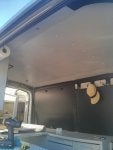
Here are some basic pics. I will post more detail as long as I have capacity.
It has been a most enjoyable project. I have worked on it virtually every day since December 01, 2015, except for the 18 days my new Transit was undergoing extensive warranty repairs.
The build took about 12 weeks and cost $2,457 in materials (that's about US$1700). That includes a third AGM battery, a 1000w PSW inverter, all cables and wiring, a Whynter 45 qt freezer/fridge, a Dometic portable toilet, a third automotive lounge seat, a queen mattress, a NOCO Genius 7200 battery charger, and all the miscellaneous materials, fasteners, paint, and hardware.
Most of the cabinetry and furnishings are of refinished solid oak, and oak veneer plywood. I was very lucky that some good friends alerted me to a take-away-please furniture give-away at a neighbor's driveway.
KEY FEATURES - Touring for Two
We were unable to find the combination of features we wanted in the resale market. So, encouraged by many on this Forum, I custom ordered a Transit, finalized my design, and built exactly the conversion I wanted.
It is compact and simple. The short 130” wheelbase was predetermined by daily driving needs and small city living. We wanted front and rear door camping access, a full queen bed, a fridge, a portable toilet, a simple water supply, comfortable lounge seating, mountain bike stored inside, flexibility for hauling, and a nice airy feel inside.
I did not want a propane based system or exterior waste tanks, nor did I want generators or gas cans, or even a solar system. I also wanted to avoid sheet metal cutouts on my van. Through careful compromising, I think we ended up with most of what we wanted!
Here are some basic pics. I will post more detail as long as I have capacity.


")