Ford Transit USA Forum banner

BUILD THREAD - Leviathan, a great gray beastie

19K views 57 replies 15 participants last post by  Ranger Robin  
#1 · (Edited)
Leviathan
noun

  • a giant sea monster with roots in pre-biblical mythologies
  • any huge marine animal, as the whale
  • anything of immense size and power
A large gray van affectionately known asLevi'

A Little History

After 21 years camping and traveling in my Four Wheel Pop Up Hawk Camper on a Ford F150 4X4 pickup I have decided to opt for less off road ability and go with something roomier with more of the comforts of home. I wanted more space for traveling solo and sometimes with another person and my dog. And maybe, the cat……While set up of the FWC was really easy, I wanted to skip the popping up part and all the bed assembly and disassembly and gear/dog stuff rearrangement that that entailed. How did the dog accumulate so much stuff??

Purpose and Planned Use
A three season van as a comfortable base for dispersed camping in remote locations, occasional campground or city use. Trips commonly three to 30 days, sometimes longer. Capable AWD for moderate dirt road travel & adventures. Park Ranger's Motto: "five minutes of walking can save five hours of digging'......
Larger solar array as I tend to reach an area and stay a few days. I rarely use shore power (I worked in campgrounds for 30+ years so generally avoid them now).
I hardly use an inverter, but WTF why not, I’m trying to create more of a camper/RV thing for more creature comforts in this next phase.

Basic stats
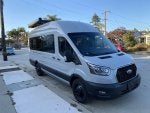
  • 2022 148" Extended Body HR T250 CARGO AWD (R3U body code)
  • Avalanche Grey
  • 3.5L EcoBoost V6, 3.73 HD axle
  • Most items on the Adventure Package: dual AGMs, all available electronics & cameras etc. HIDs, push button start, 12” screen, Leather 10 way seats w/aftermarket swivels, HD tow package & controller.
Design Principles
  • Comfortable base for solo adult traveler (sometimes two) and a 40 pound yellow adventure dog. And maybe the cat …..
  • Mind build weight and maintain crash safety features wherever possible.
  • Not stealth, its my big ass, gray camper
  • Colorful aesthetic vs cabin/rustic/woodsy look
Must Have Features
  • Comfortable bed with NO daily assembly/disassembly, ok - I will make the bed by pulling up & fluffing out the down comforter but that's it.
  • Waterless dry toilet (aka Natures Head Composting Toilet)
  • Reliable 12VDC refrigerator, tired of the old 3 way PITA in the FWC.
  • Propane for cooking & heat
  • Comfy place to sit with legs propped up - see adjustable base bed
  • Space to entertain 3-4 adults in bad weather
  • Westfalia style open concept for 'dog floor space'
  • Good insulation & ventilation w/o overthinking this, I prefer warmer climates
  • Garage style design w/storage for my big ass eBike &/or regular bike
  • Removable cubbies/storage to accommodate scuba tanks & wet scuba equipment
  • Rear door shower/hose off area
  • Overland Systems 180 degree batwing awning
  • Integrated travel safe for travel across our southern border (and maybe the northern border too...watch those polite Canadians......)
  • Viair Compressor, Maxx Tracks, recovery gear, prolly no winch
Layout & Materials Summary
  • Thinsulate insulation & Kilmat type sound deadening
  • Propex HS2000 heater, still have my simple Mr. Heater Buddy and it was overkill
  • U/M RV Propane tank on passenger side w/ext connector for BBQ outside
  • MaxxAir fan almost most forward, solar aft of that, minimal roof rack, simple fairing
  • Driver’s side VWD openable window and a CRL awning window @ bed
  • Passenger side: full glass, all openable exc. slider door - again, the dog's needs for views..........she won't sit up front no matter what type of coaxing.
  • Galley behind driver w/raised up 130L 2 way fridge, oven/cooktop combo, sink with faucet, pull out handle & soap dispenser
  • 36” Transit bench seat against the bed serves as dog bench/bed for underway and a step up into the bed (Four Wheel Camper style)
  • E-W adjustable bed - full size, garage underneath
  • 80/20 extrusion construction
  • Bug Wall Screens side & rear
  • LONSEAL Linen Artichoke flooring on 1/2” marine ply & mini cell per Far Out Ride
  • Upholstered walls in grey marathon tweed or similar sunbrella with raptor liner sprayed on lower rear garage walls
  • Two Amazing Auto swivels on 10 way power seats
  • Table(s) with Lagun mount or convertible table TBD
Electrical
  • 12VDC house system based on Explorist.life designed plan
  • 400 A Hrs Battleborn batteries (4x100)
  • 740W Solar from two Solaria 370W Solar panels in series
  • Victron MPPT 150/70Tr charge controller
  • Victron 3000W charger/inverter with digital controller
  • Sterling BB1260 DC-DC Charger (60 Amp)
  • Simarine PICO Blue monitoring & display
  • 30A Furrion Shorepower inlet
Plumbing
  • 20-40 gal fresh water tank TBD, inside mount, w/H2O pump etc
  • 20 gal grey/yellow tank, planned under mount or may go simpler
  • Isotemp Spa 25 Water Heater mounted under van
  • Nature’s head dry toilet, TBD plumbing of P tank to gray/yellow
Kitchen
  • Isotherm Elegance 130L AC/DC fridge
  • Dometic R31 Oven/3 Burner propane stove
  • Microwave TBDecided
  • Modena brand U/M Stainless sink 15”X17”
  • Appaso brand Kitchen faucet with pull out sprayer
  • Propane BBQ for outside cooking
Other Items
  • 12 VDC under mount A/C - ProAir unit - cool dog in van during grocery run, not thinking this is for running on hot days/evenings
  • Adjustable Zero G bed unit
  • Lagun Table w/mount or free standing adjustable as in FarOutRide
  • Is the cat coming or not……
  • I'm taking my time with the multitude of necessary decisions and the crazy workload needed to accomplish this project. I'm so grateful for all of the folks who have gone before and posted their build threads. So many helpful tips and experiences to draw from. I won't redo what as been effectively covered but will show what might be helpful to others (mostly my epic mess ups). I've barely started and after redoing almost every project two or more times, I'm taking a break and posting where I'm at.
 
#2 ·
Bought the van at the end of May from Ed Bowers - Crew Van Man. Flew out to Kansas City and drove it home. Highly recommend using @CrewVanManInfo for getting the van you want. I did a trip review for the first van I got from Ed. Bought my van @ Gary Crossley thru CVM - Ed Bowers - a...

Started work on Father's Day. My Dad loves to tinker with vintage motorcycles and any type of old car you can think of. He is always up to help me with my latest crazy idea/project. I showed up on Dad Day with a major first van project and while he was excited to help out, he was in disbelief that I was about to cut giant holes in my brand new van.

Image


The Start:
Image


Image
 
#3 ·
Do your build in your own sequence but I would leave solar for later. You might find with 400 amp hours of battery and alternator charging that you just don’t need it.
You do have a pretty big fridge, mine is a 75L, and I don’t know if you are only going to heat water while underway. Try it for a little bit without solar, you might find you never miss it.
 
#7 · (Edited)
Ya, sorry and thanks but that ship sailed. 🤣

Happy with the plan, had a long time for planning whilst waiting for the van. I wouldn't do it w/o solar and will be installing Undermount A/C so all charging methods welcome as I tend to stay in place for longer periods rather than drive everyday.
 
#6 · (Edited)
Many have posted their window process, not much to add here.

I ordered it with rear door and slider fixed Ford windows. Initially I was doing two "pill type awning CRL windows in the back at the bed area. But after seeing the good views had by @gregoryx and @Mauronic AND deciding the dog would love a window at her mid-rear bench seat, I added full passenger side glue in windows from VWD. Did will call pickup while heading up I-395 on the windows and saved a ton of freight charges. VWD has the most excellent customer service. There was some dried up primer and some other small errors and they always made it right as soon as I brought it to their attention. Check your VWD primer carefully before cutting holes in your van. OR buy a sealed metal bottle of primer (from VWD or Napa or Amazon) - it lasts longer that way.

I thought a slider window & mid-van window would look dumb w/o the rear section window so I went for the full length passenger style window effect. Came out nicely if I do say so myself!!

Followed the VWD videos. Got the high ratio hand pump for the urethane on amazon and "V" notched the plastic tube end as directed in the VWD instructions videos. No leaks in three urethane installed windows. Wish I could say the same for the little CRL pill window!!! That took a few reinstallation attempts at sealing a big leak and I ended up using some butyl tape under the inside trim piece to stop the leak. I recommend using some hex head tiny screws to attach the clamp in trim ring to the window instead of the tiny **** phillips head screws they provide. For sure, pre-drill the pilot holes - their instructional video makes that sound optional. Just do it before installing a CRL clamp in.

Cut the first window with my jig saw from inside the van. Big mistake - the not-so- flat surface and obstacles made the saw blade track everywhere off course. Next three windows used a punch to mark the widow "lines" from inside. Traced punch marks with sharpie on outside and found this worked much better. My advice - cut w/jigsaw from outside! Gather & control those metal shavings, they go everywhere.

I felt like a pro by the fourth window cut.....luckily the glue in windows have large tolerance for boo boos.

Sorry not many in progress pictures, I was doing the work (props to those filming and IG'ing shorts and all) and well, my Pops doesn't do the iPhone photography very well.....😉

Let the cutting begin:

Image

Image
Image
Image
Image
Image
Image
 
#8 ·
Jumping ahead to last week - here is sneak peek at where the van is now. I'm behind on starting the thread and honestly I have wavered on even posting anything as I have to redo every **** thing twice. It makes me wonder if posting anything would ever be helpful to anyone. Maybe it will serve here as a guide on what not to do.

Had a multi week trip to Mammoth Lakes and Truckee planned so rushed to get the van into "metal tent" stage for the mostly campground bound camping trip with friends. Might have had some adult beverages at Raley's and Truckee Brewing but alas, no Miracle Whip sightings!!!

Highly recommend using your "metal tent" in the early stages to test out your layout and ideas. I came upon many ideas for my 'to do' list despite having over 20 years FWCamper experience to base this build off of.

Very happy that my skittish doggo loves her bench seat & windows.......

Ignore the massive mattress, I literally finished the bed framing a'la @maia and @VanMode on Friday night and had to leave early Sat morning so I just grabbed my spare bed mega-mattress from the house. Despite the 12" mattress putting me into the rafters, at 5' 10" I was fine sleeping across the transverse bed and was able to sit up on the bed just fine. I want cabinets at the feet and have the undermount A/C blower unit to mount at roof height so the bed WILL be lower....eventually....someday......

Image
Image
Image
Image
 
#9 ·
It makes me wonder if posting anything would ever be helpful to anyone.
There were so many things on the build list in your first post that had me thinking: "Oh, I am looking forward to seeing how RR does that and what it looks like in place." I can't be the only one. So thanks for what you've shown so far, and I hope you keep on posting your build.
 
#10 · (Edited)
Installed the VC Rocker Guards pretty early on.

After using them camping now and for the 1349 times I get into and out of the van each build day, I have to say I'm super happy with them. Low profile, serve multiple purposes and they look nice. Haven't tried rock sliding on them yet, so don't ask.

Info here: Installed some Van Compass Rocker Guards & question...
 
#20 ·
I ordered it with rear door and slider fixed Ford windows. Initially I was doing two "pill type awning CRL windows in the back at the bed area. But after seeing the good views had by @gregoryx and @Mauronic AND deciding the dog would love a window at her mid-rear bench seat, I added full passenger side glue in windows from VWD.
Great job!

Installed the VC Rocker Guards pretty early on.
Those really make a difference? I guess you added some bigger tires. What am I saying, I don't have the budget for those anyway.

I put some Falken Wildpeak AT3W LT 245/75/R16 's on right before the camping trip.
Oooh nice. I don't know what I was thinking when I replaced my OEM tires with questionably better and just as ugly other tires.
 
#11 ·
Tire upgrade.

I'm kind of ghetto sometimes. I'm ok for now with my stock steelies. I hate the center cap things but I ordered some 3D printed covers from Hein. Yet to be installed.

I put some Falken Wildpeak AT3W LT 245/75/R16 's on right before the camping trip. Did 1200 miles - they rode great, tracked well. MPG def lower with partial build, solar, jerry-rigged fairing and larger tires. Averaged 14-15 MPG on the unmodified computer, so maybe 4% higher than that with this larger tire size. I have front wheel well liners and they rub slightly when turning. The ends of the liners aren't attached very well because of the rocker guards or lack of OEM trim due to rocker guards. See that post for deets. Will roll/pound the pinch welds and heat & reattach the plastic liners better when I get the time then spray the painted exposed ends. I have a long list for a raptor liner spray project coming up.

Discount Tire busted up two of the brand new Conti OEM tire beads when dismounting them (sorry deleted the pics) ....USE LUBE people. Somehow those two tires with busted bead were on the bottom of the stack in the back of my van when I drove home....wasn't happy upon unloading. I called the shop back and spoke to my service advisor and he told me 'it happens nothing they can do'......I have had hundreds of tires dismounted, patched and remounted and never have seen this busted bead thing. I know that doesn't mean it doesn't happen. So, five minutes on google confirmed my experiences. I called the next day and second Discount guy told me that 'sometimes it happens, sorry nothing we can do'.

So I loaded up the two busted tires & went to the store and asked to talk to the manager. He took a quick look & said that isn't right. And he made it right. Have to shout out to Discount Tire, Sport Arena, San Diego for doing the right thing. Customers, insist on talking to someone in charge. The guys work their butts off in there and they are always really helpful but don't accept what the tire jockey might tell you first thing.

So I have three (instead of five) like new OEM Conti Tires for sale at a great price if anyone is interested.

Image
Image
 
#13 ·
  • Adjustable Zero G bed unit
I knew I wasn't the only one. Once you get used to an adjustable bed w/remote, zero g, and other niceties, there's no going back. Good choice. They also make under-bed storage a cinch, especially the top half (my battery bank/power system is under the bottom half). Just press the remote and suddenly you have nearly open access to all that storage space.

I debated a lot over mattresses, and have found a 10" hybrid to offer excellent comfort + support (no middle sag). In my twenties I used a firm Sealy Posturepedic for a good 7 years and loved it. As I got older I kept spending more and more on mattresses, getting thicker (12-16") and softer ones, but I was never quite pleased with them. Turns out I just prefer the firmness that 10" and similar mattresses offer. Foam always sags eventually, but hybrids seem like an excellent compromise. They don't work quite as well with adjustable beds (need to be sitting upright on the bed when lifting to "couch mode" to prevent folding at the bend), but it's worth it for sleep. On a recent 8 week trip in the van, even at the end of the trip there was no noticeable sag in the center. With the pricey all memory foam one I bought years ago (and returned to Mattress Firm within 30 days) it had started to sag after 2-3 weeks.

Cheers.
 
#14 · (Edited)
I like it so far. I like @gregoryx' adjustable height bed with linear actuators to also 'sit up' but I decided to just try a low profile platform adjustable after seeing it on Humble Road. I also liked that I could pretty easily get it up and out of the way as my electrical system will be in the dead space under the fridge cabinet at the head of the bed in front of the wheel well.

But even with a 'low profile' designation, its almost 3" thick. I'm still pondering of there's a way to frame 80.20 around the outside of it to support it. Right now its sitting on top of 80/20 as I needed something to go camping and with 80/20 I can rearrange it all if I think of a way. It doesn't work very well with that type of spring mattress and with the reduced height.

I'm one of the odd ones that can sleep on any old brick as long as I add a memory foam topper so will try one of the thin 4" Ikea mattresses with a topper I think. Cheap combo. I sleep great on a Tuft & Needle at home and thought about putting a new one on my bed at home and trying to cut down the thickness my old one to fit but it seems like spending too much. I'm fine chopping corners off but doing a longitudinal flat cut across the whole short queen doesn't seem easy.
 
#17 ·
This is the panel I selected: https://static1.squarespace.com/sta.../6054d3ff35b6ae546f73dd95/1616172036505/Datasheet_PowerXT_Resi-370PD_Rev_04.pdf

This is the vendor: https://tandem-solar-systems.com - they do will call and I was prepared to go pick them up in San Diego but they brought them to my house for free. Freight was a lot so that made a big difference. I think they are in northern LA and SD Counties as far as warehouses. I paid $707 out the door for both panels w/tax and no freight.

Let me see if I have enough pictures to post a write up on my rack installation. The dog got skunked this morning at 0600 and the skunk has holed up under my van in the planter on the neighbor's side of my driveway. 🤬 I'm not feeling like much will happen van-wise today, just sitting down with coffee after a morning of dog bathing and trying to get the spray smell out of the house. 🤬🤬 its excruciating with a full strength spray - you think this #*&! dog would learn, it's about the fourth time she has tried eating a skunk.
 
#16 · (Edited)
Other early build things:
Limitless Vans rear tire rack. "Scored" off CL for $100. I saw that ad and thought oh its stolen for sure. I talked to the guy and he seemed legit but it was all the way up in Carlsbad thru hellish north county traffic. Then a couple days later I had to go to Carlsbad for a meeting so made arrangements to swing by and take a look at it. It was boxed with his name and address on it but the rack was incomplete. It needed a bunch of hardware and the actual thing the tire mounts on (shown in this pic)

So I called Limitless Vans and even though they don't sell these to the public anymore (only install them on their builds) they agreed to help me cobble together the missing parts. $600 later I have a rack. The top bracket that mounts inside the door (not on the hinge) broke right before I was to leave on the camping trip causing much concern (was an original piece) but they shipped out their updated version bracket which is much sturdier.

I'm probably the sole reason they will never sell to the public again but they have't seemed to have blocked my number yet. Kudos to Limitless Vans - another business doing good by someone who they really wouldn't normally be troubled with. Their builds are beautiful BTW in case you want a pro builder: https://www.youtube.com/c/LimitlessVan

Image


I have a steep, narrow driveway and at mid-build she clears it just fine. Or does he clear it just fine? Not sure if Levi is male or female just yet, maybe its a "they".

Anyhow, new tires on a new black rim picked up with the van from Crew Van Man and we are in business. I got the rack despite concerns over door stability/reports of doors tearing. Those issues seem to be on older vans. (let's hope) I wanted to clear some space underneath for the undermount air conditioner, propane tank, Isotherm water heater and a gray tank.

Now that I have the larger tire mounted, I'm wondering if I should lower the tire mount so the tire is lower and almost touching the step. Even a few inches lower helps a lot to reduce the torque on the rack and those brackets when bumping along the road. The mounting plate is totally adjustable - the rack is like a large aluminum molle panel.

Image
 
#57 ·
Other early build things:
Limitless Vans rear tire rack. "Scored" off CL for $100. I saw that ad and thought oh its stolen for sure. I talked to the guy and he seemed legit but it was all the way up in Carlsbad thru hellish north county traffic. Then a couple days later I had to go to Carlsbad for a meeting so made arrangements to swing by and take a look at it. It was boxed with his name and address on it but the rack was incomplete. It needed a bunch of hardware and the actual thing the tire mounts on (shown in this pic)

Now that I have the larger tire mounted, I'm wondering if I should lower the tire mount so the tire is lower and almost touching the step. Even a few inches lower helps a lot to reduce the torque on the rack and those brackets when bumping along the road. The mounting plate is totally adjustable - the rack is like a large aluminum molle panel.

View attachment 178599
Any update on how the ladder/rack is holding up? Any door tearing issues?
 
#18 ·
Look great. Except for the color, I went abis grey, and the propane your lode out looks much like mine. Only have the one, passenger, swivel from AA. Best of luck with it. And great name by the way.
 
  • Like
Reactions: Ranger Robin
#19 ·
Weather Guard Roof Rack & Solar panels
I used Weatherguard Roof Racks (I said ghetto, I wasn't joking wait til you see my rattle can version #1). I liked the versatility and low profile system. And it was a low $$ investment if I decide later to buy a full on roof rack. I like the low profile rack systems from AVC, Unaka and Hein's options if I were going that route and those seemed like I could make them work with my larger solar panels but not my preferred awning so I tried a WG system after seeing someone else's install.

My 370 W Solaria solar panels: https://static1.squarespace.com/sta.../6054d3ff35b6ae546f73dd95/1616172036505/Datasheet_PowerXT_Resi-370PD_Rev_04.pdf
They are basically 64" long and 44" wide and 1.5" thick.

Before you rush out to find a Weatherguard system, know that Weather guard support for using their products on your camper van - SUCKS. They will come right out and tell you NOT to use or modify their products for your camper van. They really want everything to be installed by pro-upfitters on commercial work type vans. Not on your dream camper. Just be forewarned. Their stuff is well made and cheap but they are mired in the past. By sheer luck I was able to track down the last necessary parts from a re-seller on eBay to make my rack work because some Weatherguard racks come with all the pieces you need to attach the feet to the channels and some do not. Mine did not. Weatherguard won't help you and honestly Lowes was lost. Buyer beware is all I'm saying, you'll get much better service from companies catering to DIY van builders.

I got the weather guard items from Lowes special order but it looks like they aren't carrying it any longer.

Like every good DIY van builder, I found the system/idea from a gal who posted their set up on fb. I will include her photos because they are better than mine.

If you mount them like she did, you will have a super low profile set up. Like she mentions, at the outer edge of the van its 5" tall. In the center you have about +1/2" clearance between your van roof and the bottom of the 80/20 cross bar. Super low profile but still allowing airflow under the panels for ventilation.

My rack version 2.0 is a little higher than this set up so the awning can attach on one side. I'm happy with it now and got the awning I wanted. If you're doing no awning or maybe something traditional like a Fiamma type I'd say go with an AVC, Unaka or Hein Roof Rack system with these larger size solar panels.

Or yes, use Orton's system and use one big panel and attach it directly to the roof, simple and easy.

Image
Image
Image
Image


Only overhead shot I have of Levi rack V 2.0

Image
 
#22 ·
My Roof Rack Install v2.0

I'm happy with the result. Well, I will be once the fairing is installed. It whistled like a tea kettle on high so I improvised a fairing from an old truck roof rack which fixed the unbearable sound. I have ordered a plexiglass fairing from Unaka.

The large panels don't hang out over the van edges (the mounting feet do slightly). I maximized my solar W with a minimal size rack while still providing heavy duty attachment points for my shade awning. The awning covers 100% of the slider, most of the the front door and pokes out far enough in back where a shade cloth over the two open back doors (like my pending bug wall) will provide a nice canopy. I like me some shade. Overland Vehicle Products also sells a 270 degree awning which would cover your back end w/the doors open.
  • RR Rack v1.0 was heavier 1.5" X 3" extrusions and I figured out that using standard 15 series lite was sufficiently strong and stable with my Weather Guard Mounting system.
  • RR's Rack v2.0 is black 15 series lite with one of the 1.5" x 3" pieces for the middle support leg that holds both solar panels.
Center of van roof metal to bottom of cross bar extrusion is 1 7/8" and measurement from the outside edge of the van to the top of the solar panels is 7 1/2 "

Image


Image


Awning Pics on RR Roof Rack v1.0 - so its lower now by 2"

AND since the pics were taken, I raptor sprayed the totally ghetto white, silver and rattle can black rack feet, much happier with the result. I used Raptor 2.0 in a can - its a two part epoxy that should last longer than the standard bed liner in a can (which raptor also sells) its a little but more expensive ~$30/can and you have to use the whole can w/in 30 minutes of mixing the components but was easy to use. ✔ The more projects I start/do, the more value I'm placing on "EASY" .

Image
Image
Image
Image
 

Attachments

#23 · (Edited)
Bench Seat Installation

My dog won't ride on the passenger seat. She just doesn't like it up there and thats fine with me due to air bag constraints, dog farts etc. Sometimes I transport more than two of us so this can be a short stint seat belted place for two others as well. So I planned a Westfalia type layout with a bench seat for her to ride on and hoped she would use it. That layout allows more open space for multiple people to be inside in bad weather. And after camping forever in a Four Wheel Pop Up camper, I know one or two dogs underfoot gets cramped very quickly, so keeping a more open plan and having places for the dog(s) to sit and get out from underfoot was my goal.

Purchased this 36" bench seat on eBay from an Orange County local upfitter. Did will call and saved even more. Can't give an active link, their listings come and go. Always scour Craigslist as well and check Van Upfitter companies local to you.

They came back online: Bench Seats R us | eBay Stores


Image


Seat came with "Universal Mounts", some HD mounting washers & bolts and brackets which would have worked just fine. BUT, I picked up OEM mounts on eBay and some rails from the CrewVanMan when I picked up the van and I set about making quick release seats which will be a little more useful in the long run.

Image


OEM mounts bolted in, watch your model years closely or measure the three bolt holes carefully on the seat they changed mounting locations around 2019.
The seller where I got mine isn't active but the OEM mounts are out there.
Image


Image


Ignore the butcherblock, its too wide, it just up there for utility during the build.

Image


The benchseastrus seat came with this heavy duty bracket which was probably designed to mount inside but I used it as a bracket underneath to spread out the clamping area of the bolts.

I also ordered big washers and lock nuts for the underside - used the OEM bolts they are 12mm X 1.75mm sizing.

I forgot the universal kit had nuts included.....oh well, I need to be more organized .....

Image
Image


Friends all asked why I'm not mounting the bench against the passenger side wall/wheelwell. Pass side mounting, in MY layout would leave a tiny 8-11" aisle which I didn't think would be useful. 36" benches (and the funky leg locations) are designed to line up on the driver's side wall. If you're not using that location, you are limited where the bench can go - you have to do some careful planning where to mount it. The gas tank and exhaust systems are right under my desired location. Took a lot of measuring and marking and crawling under the van then everything is upside down and you have to get out and look at it again. Its fun.

I decided after looking at possible locations, that I wanted my bench against the galley. I got it. The 'dead' cabinet space created by the seat will house the electrical system underneath the refrigerator. Removing the seat will allow me to have good access to the electrical system.

The more open space between the seat and the passenger side wall will have some of the water tank, possibly my travel safe, some built in storage boxes & lagun table mount. Having those items will allow me to pad the top with pillows and give the dog a little more space.

Toilet will be in its own box in front of the bench a'la Miracle Whip design.

Before you ask, YES I tried incorporating the zebra skin rug into the permanent design but it was too difficult to clean. Had to rework my whole design aesthetic when I decided this rug wouldn't work.

Image
Image
 
#25 ·
The dog says I should revise my comments:
...she would sit up front if I let her drive
Looks more like "If she let YOU drive" :unsure:

I like your "Westy" style layout. Then too I like the galley in front of the door because that's the only place the "window" is high enough to look out of standing up (really the open door). But I have a feeling that open square space would win out in my book, just like in yours.

Could I ask how deep the 8020 framing for your galley is? Meaning in the 18" to 24" range of front-to-back while standing at the counter. Thanks.
 
#26 ·
@Vanaroo its 22" deep
I used the OurKaravan kit for the 130L Isotherm. I have since modified my layout to inset & raise the fridge up next to the bench seat and will modify the kit to hold my oven/stove combo.
 
#27 ·
Flooring

Followed Far Out Ride's two layers of minicell under 1/2" marine plywood. Didn't want to wait for the delayed baltic birch from my normal supplier so I went over to a local lumber yard and found some Canadian marine grade plywood that looked good. Noting like Aquatic or the 3/4" Meranti I used in my boat last year but better than anything at the big box. Did a coating of Jamestown epoxy on the undersides and edges before glueing in place.

Used some simple #10 biscuits to hold the sheets level, filled edge cracks with Loctite Doors & Windows - its pretty flexible stuff haven't; had any squeaks. I made sure I had a good gap between the plywood and van walls.

Set some T nuts into the flooring in the hopes of attaching bike slide, galley cabinetry and toilet box better to the flooring. Got the idea from @Sams stock van - Sam made the project look easier than it was 🤣 mostly because I failed to make a good template before epoxying the lonseal down....

Guy down the street isa plumber and has a new Transit 148" extended van, been talking to him, he ordered a bed rug and let me use it for a template. WOW did that save me a ton of time. Only cost me a case of beer and he asked for Michelob Ultra OMG. 😉 Bed rug was lighter than I expected and more plastic-y than I thought I would be and it would have been a fine underlayment. But, I had the minicell already.

Image


Five minute floor job - nice floor, better as a template!

Image


Back smaller piece of the floor was little 'warpy'
Image


Popped the biscuits in (they were glued in, this was a test fit)

Image


No more "warpy"

Image


Image


Image
 
#28 · (Edited)
Lonseal Installation w/ West Systems Epoxy

My advice:

  • Do it on a cool day - 70 degrees is your best temp. I did mine and it was 80 and that was fine but pour the mixed epoxy out onto your plywood ASAP to prevent run away heat/melting, mess.
  • Use a 100# roller, Only had a hand roller and a steel scuba tank and wished I had rented the 100# stand up roller.
  • If using West System epoxy - mix a tiny batch up first to get the ratios right - the two parts of the epoxy are easy with the metered pumps but you have to figure out how much 406 colloidal silica to add to get you to a mayonnaise consistency. Maybe do this the day before, mix up three pumps each and get your 406 additive right then you can scale your batches correctly.
  • I found making a container with 30 pumps each to be a good working amount. I used a Costco sized cottage cheese container to give you an an idea of the volume of 30 pumps each.
  • My 148' WB Extended floor took three (or was it four now....😳) batches of 30 pumps each. And I should have used less, the first batch went on too heavy and thats not desirable.
  • How much to buy: For West System epoxy w/the 206 slow hardener (or hardener appropriate for your temps). I used the "gallon size" epoxies: the resin part 1 #105B is 126.6 oz and the hardener is 27.5 oz. I used about 3/4 gallon total on my floor. I used two 5.5 oz containers of the 406 Colloidal Silica. (its super light, gets everywhere! Use an appropriate respirator!!!!)
  • Find the tiniest notched trowel you can and use it - a 1/16" epoxy scraper was the smallest I could find and it worked well although I wish it had of been a traditional scraper with handle: I used this: https://smile.amazon.com/dp/B0186IOH1K?psc=1&ref=ppx_yo2ov_dt_b_product_details
  • Mix the batch per the directions and then pour the whole container out onto your plywood. You will have plenty of time (20+ minutes, temp dependent) to work the epoxy around if you get it out of the taller container as soon as you're done mixing it. If you leave it in the container, it will set up or kick off creating its own heat to which accelerates its process and forms a hard gelatinous unusable blob.
  • With West Systems and Lonseal, a very THIN EVEN layer is your goal. It should almost look like you have scraped the epoxy off the plywood. Any ridges will show through your floor and if you have too large of notches in your trowel, you will have to roll a lot of epoxy out from under the floor. This is what causes the ripples or uneven spots. And its messy with extra epoxy oozing out everywhere. Don't ask me how I know this. I lost some of my T Nuts under the floor because they filled with excess epoxy - made locating them very hard.
  • Read the WS and Lonseal instructions:
  • Read the Miracle Whip Lonseal installation info BUILD THREAD: Miracle Whip
  • Check out @MsNomer's marmoleum installation, its very similar
I'm happy with my flooring and if I had to do it all over again I'd still go West System + Lonseal but I would follow @maia's advice 🤣which was points #1 and #2 above.
My floor has some ripples here and there but its all covered by cabinetry or its in the garage. It shows sometimes in pictures but in life you don't notice it.

Below is the desired thickness at the top of the picture. I trowled the epoxy around first with a standard trowel (showing in the lower part of the picture)
Then I used the tiny plastic spreader to scrape the epoxy down to the 1/16" thickness
The area shown in this pic is about how far a bucket of 30 metered pumps of the West Systems epoxy went. From just behind the slider door opening to the middle of the wheel wells. Once I spread out the thicker stuff at the bottom it went a bit further.
It goes much further than I thought it would having only experience with tiling floors with mortar. I had also previously only used epoxy to coat and 'waterproof' the backsides of plywood for another boating floor replacement. This was my first bonding experience with epoxy, first time using fillers etc.

Image


Slapped some extra plywood down and added heavy things til it set up. The front 1/3 area had already set up.

Image


The finished product. The ripples are more noticeable in the pictures than in reality. A lot of the weird lines are actually reflections as it was early and the sun was low for these pics.

Finished off the rear door area and slider entry with the OEM Heavy Duty Scuff Plates. Added a bit of minicell under the slider door side to level it with my floor. Ran a bead of butyl tape around the edges and screwed the heavy steel plates down. Its very solid.
The rear trim piece fit best when I removed a foam spacer that came with it, also screwed it into the plywood with butyl liner.

I will find a trim piece for the transition to the cab area.

Image
Image


Image


Spent a lot of time and worry trying to get the floor flat then I spent a half day poking around with an ice pick to locate and cut holes in the flooring for my T Nuts! 🤣
The T nuts in front where I laid the epoxy on too thickly, were filled with epoxy. Once I located the T nut I had to use a combo of box cutter, ice pick and tap & die to clean out the threads so the threaded insert was usable. Luckily the tap tool cut right thru the epoxy once I found the nut.

Image
 
#29 ·
@Ranger Robin
I love the look of that green Lonseal!

Just a note for future epoxy users: Colloidal Silica is very dangerous for your lungs, and (as RR mentions) it flies everywhere. I wear a good respirator whenever handling it. (Even though it might be tempting to "just be careful for this one quick job.")

I can see I'm going to need to learn how to do biscuits (or similar). They made for a perfect joint.
 
#30 · (Edited)
@Ranger Robin
I love the look of that green Lonseal!

Just a note for future epoxy users: Colloidal Silica is very dangerous for your lungs, and (as RR mentions) it flies everywhere. I wear a good respirator whenever handling it. (Even though it might be tempting to "just be careful for this one quick job.")

I can see I'm going to need to learn how to do biscuits (or similar). They made for a perfect joint.
Its Linen pattern in Artichoke color. I ordered a bunch of free samples from Lonseal - they have tons of options. The linen pattern is a really nice one if you don't want the wood floor look.

Absolutely wear a respirator for that, the warnings are on the labels which every should read/heed. It is oddly statically charged. It almost flows like water and ends up drifting around on the worktop and it's difficult to get out of your measuring cup. Its some weird stuff. We had the vacuum handy for trying to control it after mixing. Keep the cover on, watch some videos about 'cutting in" so you don't poof it out of your cup when mixing in etc.

A friend had a biscuit joiner, you can probably rent one - it takes a couple of practice cuts to get your depth set correctly then it goes very fast. 1/2" ply is about the narrowest it would work on but its held up nicely. Simple and effective so far.
 
#36 · (Edited)
I just had five windows and the windshield tinted with 3M Crystalline and 3M Ceramic tinting in Ontario (LA area) for $1000 total. If you're in the area talk to Casey at Perfect Touch Tinting, they have a shop in Ontario and one in Laguna Niguel. Great communication, did everything they asked and had the van ready right on time as promised. The shop is associated with Gator Wraps - they had lots going on.

I had two different companies in San Diego quote $1100 for 3M Crystalline 90% for just the windshield!! I wasn't going to have it done at that price. My factory windows were clear - aka not privacy glass so they really stood out and let in a lot of sun and heat if I had them uncovered

EDITED 9/24: I've been in beeeeauuutiful Parker Dam, AZ & Yuma, AZ on the river for three days and what a difference the 3M Crystalline clear coating makes on the windshield!! Just going by the heat I feel thru the front when driving. Its been 103-107 degrees and for two days I was out and about driving around. Don't have to have the A/C blasting on full speed while my back is covered in sweat due to the heat. I'm super happy and would do it again.

My thinking was that you need the more pricey stuff on the windshield and driver/passenger side windows because they are almost clear. Any old thing you apply will block the UVA/UVB rays which age your skin and cause skin cancer. But you need some new tech to stop the heat transfer thru the glass and still allow cell reception etc... When you are parked obviously you put up the reflection shades and that helps greatly. When you are in a safe spot you can drape your shade over the outside of the windshield and that helps even more. But when you are driving in the sun and its hot, this is what you need on your windshield. For rearward windows I'd say use cheaper films because the darker films help block more heat transfer so you can get away with something you apply yourself inside or outside. The guy at the tint shop just made me an offer I couldn't refuse and having them all professionally done in reputable 3M film for $1000 incl. tax was worth it to me.

YMMV and you do you and all, this is my totally subjective opinion based on 25 years in this lower desert in brutal heat.

3M Crystalline 90% on windshield
3M Crystalline 70% on driver & passenger windows
3M Ceramic 15% on factory fixed slider and two rear door windows (they matched these to the VWD sliders I installed) Came out pretty nice.

It also looks nice because they cleaned the windows really well. I should clean the windows more often 🤣
Image


Image


Image
 
#37 · (Edited)
Post camping trip work - not a ton of things got done, have been busy with non van life things.
  • Lowered the bed & reattached it all.
  • Recessed the fridge support cabinet 1/4" as the bench seat was rubbing the front framing when reclined.
  • Rearranged the OurKaravan pre-cut galley to hold a stove/oven combo in place of the refrigerator.
  • Got a 4" memory foam Ikea queen mattress and cut it down to size - its now a short queen. 60" wide and about 5" shorter than standard length. The adjustable bed frame is a double size frame, a queen will not fit E-W, trust me on this one. I cut 2" off of each end of the adjustable frame and we barely got it installed. Will add a Novafoam memory foam topper if it goes on sale. The Ikea mattress is surprisingly comfortable as is.
  • Built an 80/20 support brace for the extra width of mattress inside of the rear door opening.
I built the first version of the bed support following the methods of @maia and @VanMode. I was rushing to get the bed in for a couple of weeks camping so I made the bed extra high, knowing later I would cut the vertical supports down to a more manageable height.

For reference, here is bed V1.0 below with a standard double size spring mattress from my guest bedroom. Its about 10 or 12" thick with the pillow top thing. It put me up into the ceiling but was comfy for a shake down trip. The adjustable bed didn't work very well with this traditional spring mattress due to inflexibility and the increased height & thickness but my tall ebike fit under the bed easily.

Image


Bed V2.0 before the mattress went in. Lowered the bed 8" by cutting the 16" support legs in half.

Image


Bed support system mimics key factors from each of the above mentioned builders.

The 15 series bed framing which is bolted to the van wall with 5/16" bolts, ties in with the custom refrigerator cabinet (orange masking tape) and the OurKaravan ready cut, but altered, galley in blue masking tape.

Here are the 16" high support legs that later were cut to 8" high.

Image


Now those same legs at 8" high. With the thinner Ikea mattress/topper combo I'm still below or even with the small pill window for ventilation. I was also able to save some weight and remove one long center support under the bed frame as it didn't seem necessary.

Image


I had an old set of Craftsman Allen wrenches that eventually stripped on me. FWIW, the wrenches rounded, the TNutz brand socket cap screws didn't strip. So I went and replaced that old set with a more organized set of T handle Allen wrenches in a stand and some 90 degree long handle Allen wrenches in a plastic holder. I was happy as it seemed more organized and I need to be better organized. I was working alone this week and have already lost the 90 degree wrench 🤬🤬🤬 WTH!!

If you're working with 80/20, get some long length ball end wrenches as well, those come in handy for the many tight spaces you will be working in. The T handles are nice but they interfere more often than not - at least on my build.

This picture shows most of my support braces unattached, I had just lowered the bed back onto the support struts after cutting them to length. The support braces have all been reattached (minus the center beam) and the whole thing, once secured together, is very solid. The adjustable bed frame is about 100 pounds, so not light.

Image


So not light, but oh so worth it to me. Plus elevating the bed ends gets you a little easier access to the 'garage' area.

Image


Spent a lot of time wrapping my head around the electrical layout. That will come after I get the consumption wiring run & probably after I get the ceiling in.

Image
 
#39 ·
Awesome! It was worth the trip for sure. Highly recommend them, he worked with me around traffic and called with updates - like who does that anymore. Super happy with the films. That week in the low desert heat was a great test to how much cooler it felt thru the windshield. 👍🏾
 
#40 ·
Frustratingly sick for two weeks, delayed any meaning full progress but feeling better & starting back up again.
  • Have been laying upside down in the passenger seat with my head in the glovebox trying to find an upfitter control module to test out an auto stop eliminator.....🤬‼🤬
***If anyone has been in there or has pictures, let me know. I don't want to take out the APIM or disassemble the dash.
  • Got some 1/2" plywood furring strips up for mounting the ceiling.
  • Figured out the Astro 1450 Plus & Riv Nut tool - works great with very little practice.
  • Set a bunch of M8 riv nuts in the ceiling and some 1/4" X 20 above the slider door for that panel.
Step One: drop glove box, lay upside down on the pass seat and insert head in there to see up into the upper dash above the APIM so I can try and insert this auto stop eliminator into "upfitter control module C290" Found many things but not this elusive module.....

Image
Image


The treasure map.......arrow marks the spot
Image


I foolishly thought this woud be a good project for while I was sick. It wasn't. Much swearing ensued.
I just bought a cheap endoscope another user posted about recently, gonna give that a try because I'm pig headed and don't want to give up.
On a positive note, I did find the fuse box and on top of and behind it, the 43 pin and 6 pin connectors for my upfitter switches.
I attached the Ford supplied 40 amp high powered 6 pin connector so I can use the 40 amp upfitter switches when I get to that part of the build. if I need the 20 A switches I will fab that plug cause there are just too many wires (43 of them..) to insert in that small space for two upfitter switches.

Lots of YT videos on Upfitter switches out there and a handy guide on this forum as well. Utilizing *2020* Ford Transit Upfitter Switches!

Next, lets get the ceiling going!
Rip down some 1/2" cheaper big box plywood. I think I made the strips about 6" wide. Following the various helpful AVC Rig DIY videos.
Image


No help today. How to get this long strip attached to the ceiling so I can make a jig for the attachment points and cut outs for M8 riv nuts???
Image


OK, not pretty but it worked. Got a couple self tappers in to make the jig/measurements.
Sorry now to anyone walking by on the street who may have witnessed this stunt from the back end 🤣
Image


Jig ready - remember which side you are looking at from underneath or on top when cutting‼‼ jus' saying.
Image


Furring strips up. Decided to use only 3 eight foot sections and added my jig and another cut off to span the front and rear strips. All will be covered by ceiling.
Image


Drilled out the ceiling holes slightly with a step bit to 7/16" which fits my M8 riv nuts.
These will be attachment points for either unistrut or 1.5" x .75" extruded aluminum to hold cabinet uppers.
I'll add more self tappers (see pre drilled spots) but I'm just SURE I'll have to take these strips down at least once more before this is over. So one here and there is good for now.

Image