Ford Transit USA Forum banner

Build thread: AndyVan! Sleep 4 Seat 4 family hauler

2 reading
14K views 107 replies 20 participants last post by  chicagoandy  
#1 ·
19 months after order a High Roof Extended Trail, after having that order cancelled by Ford, I reordered, and went to get it on Friday. One flight to Texas, then a 14 hour road trip later and we're in business.

Extensive design thread here: https://www.fordtransitusaforum.com...tusaforum.com/threads/design-thread-seat-4-sleep-4-family-hauler.97159/#replies


Goal: Build a family RV for North American exploration. (Alaska, Newfoundland, Baja California, Key West, and everywhere in between) Sleep 4, Seat 4. Kids are currently 7 & 9, but they will grow.


Options:

Extended Length, Full height, 9500 lbs GVWR
31 gallon fuel tank
Ecoboost engine, AWD
Dual Batteries, Dual Alternators, CCP2
10-way power heated seats
Short arm power adjustable mirrors
Black HID headlights
Extended length running boards
Sync 4 Intelligent Adaptive Cruise Control, 6 speakers
Aux Fuel connection


Plans:

Seat 4: Add a second row of seats to the cargo van. Seats will be 18 inch captains chairs from JMG Seating.

Sleep 4: Elevated Queen Bunk Beds in rear. Each bed will be mounted on linear actuators from Progressive automations. Selection to allow them to raise and lower. Bed Frame constructed from 1inch x 3 inch extruded aluminum 8020. Each bed will be 75 X 80 (RV queen size) and will run front-to-back. 8 inch memory foam mattress on each.


Water for 4: Continuing to search for the largest overwheel water tank. Currently the largest I've found is 35 gallon. 35 Gallon Wheel Well Water Tank (Passenger Side)

Will continue to search. Option of adding second tank in the spare tire well, but that requires somewhere to put the spare tire. Water Heater Bosch 7 gallon electric water heater. Shower will be outside the back doors, I will take a "roof rack" style overland shower frame and attach it to the rear of the bedframes.

S1 sealing toilet or Laveo Dry-flush toilet.


Food for 4: Isotherm Cruise 195 fridge with separate freezer. 2 burner Induction cooktop


Walls & Ceiling: 1/4 Birch panel with black 8020 frame.


Windows: Broad Arrow Double Pane acrylic windows from Wilderness Vans.


Electric: A very large electrical system. Starting of 16,000 wh diy battery made with eve MB31 cells and a jk BMS.

Victron 3000 24V inverter, 1000 watts of Solar with Victron MPPT, Sterling Power 120A B2B charger. Lynx distributer & Venus is on a raspberry Pi. 30Amp shorepower.

Solar: 4 X 250 Rich Solar panels mounted via Unaka rack.

HVAC: 24V UndermountAC

Cabinets: Custom Built cabinets with 1-inch series 8020 and 1/4 birch ply.

Sophisticated smart monitoring and control system based on Home Assistant.


Future additions:

Quigley Qlift

Electric awning from Fiamma or Dometic.
 
#38 ·
The (first) battery is now, actually, done.

A year ago I spent a lot of time looking at different battery options. I saw a lot of inexpensive ones, which looked great, and I saw a bunch of very expensive ones, which didn't make much sense to me. But what I didn't see was many very large ones.

I knew I wanted a large electrical system, so I knew I'd need a lot of battey storage. For a long time I was looking at Li Time, they have some great prices on quality batteries. But what I noticed was their big batteries weren't actually that big, which means I would actually need 3 or 4 of them.... and that means they'd take up a lot of space.

I started looking at some of the DIY options, and I realized that if I built my own, I could A: Use the latest EV grade cells to make a very large battery, and B: Orient them in a way to take up minimal space.

Well, here's what I ended up with.

The requirements were:
1. Built like a Brick $hit-house. It needed to be very strong, capable of surviving a high-G rollover.
2. Victron comms
3. 24V
4. Very large capacity
5. Heated
6. Reasonably attractive.

I settled on a set of EVE MB31 "EV" batteries. These are made for EV's, but they also sell "out the back door" of the factory. They are high quality, very well tested, and commonly used in the DIY solar community. More importantly, they have 314 Amp Hours in each cell. To make a 24V battery I'd need 8 of them wired in series. 314AH @ 25.6V = 8,038 Watt Hours.

Typically batteries are assembled by taking the cells and assembling them side to side. Like this:
Image


I figured if I could take those cells and instead assemble them end to end, I could get a longer, thinner battery. My goal was to have a battery no wider than the wheel well. These turned out awfully close:

Image

The box is 3/4 Baltic Birch with the stylish "hex clad" melamine that a lot of builders are using right now. It's waterproof, electrically insulated, has a high flash-point... and I like the look. I routered the 3/4 ply to give a 1/4 inch tongue, which then fit into 1010 8020 extrusions. All of the 8020 joints are made using 1/4 20 bolts through the end. No fancy joiners at all.

I 3D printed big Red & Black terminal covers out of PETG, to help make sure I didn't do anything stupid. (you'll notice I have one battery backwards in the photo). With a battery this big, an accidental short-circuit could be very dangerous. I'm happy to say I didn't have a single "high energy event" while assembling this. Built in "T-Class fuse".

Here's how it finally turned out:

Image

The internals are not as pretty as I had hoped, and it's a bit taller than I hoped. But I didn't list "pretty" or "short" as any of my requirements. It is safe. I'm confident it will survive a rollover accident without issue, and the 8020 will make it easy to bolt-down in the van.

I 3d printed the comms panel out of PETG, it has connections for RS485, RS232, and CANBUS. It'll talk to a Victron Cerbo GX, or any other system that comes down the road.

The terminals are called 'Amphenol' connectors, cables have quick-release snap on connectors. Very handy! EG4 280Ah WallMount Battery Cable Connector | Orange

It's very heavy. Guessing 150 pounds, all-in. Luckily I could wheel it around the house to get it up from the basement.

I have all the parts for an identical twin, but the second child is much lower on the priority-list.
 
#40 ·
The BMS is one of the big Chinese vendors, this one is called the JK Inverter BMS, made by JiKong (jk). It will manage cell balancing and cell heating as needed.

It reports pack level data to victron, which is enough for DVCC, so everything will get integrated with the BMS dictating charge voltage.

The one item that won't have DVCC is the Sterling B2B, I may try to get that working some day via their remote, but I'm not going to worry about it for now, I will just set a charge profile via their remote. I may just have it charge to 90% and let the victron mppt manage the top end.

I call pull cell data into home assistant when I get that running, either Bluetooth, hardwired rs485, or rs232.
 
#41 ·
I've been neglecting this thread. I've made some great progress.

Electrical system:

Assembled and bench-tested:

Victron Multiplus 24V 3kva
Victron Lynx Distributor
Victron MPPT 150/30
Victron Cerbo GX.
IMO disconnect
The custom battery.

The rear void where the rear AirConditioner goes is a brilliant place to mount a Multiplus 2. I added some insulation behind the sheet metal, used Rivnuts to secure a 1/2 inch sheet of black Hex-ply to the wall, then mounted the Multiplus 2.

Image


However.

I did need to remove and remount it, it needed a 3rd rivnut. I turned off the Multiplus, shut off the PV and Battery, removed the MP2 and set it down on the floor of the van. Added the additional support, then I reinstalled the Mutiplus. I turned on the MPPT, then the Cerbo, then the Multiplus. The MPPT came alive, the Cerbo came alive... the Multiplus never came alive. I used a resistor and connected the battery, the Multiplus still didn't wake up. I disconnected the Cerbo, still nothing. I verified voltage at the DC terminals.

There is zero signs of life. You don't hear the relay firing, there are no lights shown.

Then I called the vendor (Current Connected), opened a case, did some troubleshooting.... and created an RMA request. Then I packed up the multiplus and shipped it off to Vegas. 4 days each way. This means a two week delay at best.

<sigh>

In the meantime, I completed adding insulation (amazon basics butyl wrap), and thinsulate on the driver side wheel well, the driver side voids, and covered the driver voids with 1/2 birch Hex-ply. When the Multiplus comes back I can quickly finish the electrical.

B2B charger isn't the priority right now. The 1,000 watts of PV is keeping my battery charged for now.
 

Attachments

#42 ·
Then I went on to do the bed. My plan calls for two movable beds, like bunk-beds. RIght now I'm just doing the lower ones.

i'm using 10-series t-slot aluminim from Tnutz.com for the bed. The outer frame is made of 1030 (1 inch wide, 3 inches tall). I knew this would be very stable on the X axis. I then added a piece of 1010 to the 1030 creating a short 'L' shape, I drilled access holes in the 1010, then used 1/4 20 bolts into t-nuts to attach the 1010 to the side of the 1030. I figured this would add rigidity to the Y Axis. It is quite strong. I cannot make it deflect in either direction.

The corners are joined using simple 1/4-20 screws put through into a tapped end. 3 of them on each corner. Very solid.

Then I added 3 1010 crossbeams. I used T-Matic connectors to connect the crossbeams. I am a big fan of t-matic connectors. Strong, and easy to use when you don't have any access. https://8020.net/14200.html

Image


The feet for the bed are LG07 lifting columns from Progessive Automation. Modular Lifting Column – 440 lbs Capacity & Adjustable Height

I have a set of 4, but one of them is defective and I'll be returning it later this afternoon. Currently I only have 3 columns installed, which isn't going to work long term, but I can keep moving forward for now.

The lifting columns allow me to still use this like a cargo van. In 'Garage' mode, there's a ton of storage.

Image


I am not super-happy with the lifting columns. Even while completely compressed, they are taller than I'd like. I'd like the bed to be able to sit quite low. Later, once I have 4 funcitoning legs and I"m more confident on placement, I'll cut the floor out and mount the legs directly to the steel floor. Even so, these are higher than I'd like, but I didn't find a good alternatives.

Lastly I added an Adjustable Base from RizeHome.com. The model I purchased is no longer available. I had ordered it 18 months ago because it was a killer deal, only $350 and @Irontent had used it successfully. A killer deal, I believe it was an 'end-of-line', but it's built like a tank. Unfortunately it does add some height to the bed, which I'm not a huge fan of. I may modify the bed framing to have this hang down below the 1030 framing I built.

Image


Add an Ikea mattress, and we have a bed!

Image


Sadly, with having a non-functional lifting columns, I am now RMA'ing two products the same weekend. <sigh>
 
#45 ·
Then I went on to do the bed. My plan calls for two movable beds, like bunk-beds. RIght now I'm just doing the lower ones.
...
I assume you'll be moving the columns more to the edge/perimeter to give more garage space?

I'm glad to see you got the bed piece working!
 
#47 ·
A few updates:

On my Multiplus RMA:

I've learned my Multiplus is now on it's way back. The vendor is insisting it's functioning correctly, and suggest the root-cause is me not turning it on properly. While that's ridiculous, I'll be happy to have it back. They kindly sent it for next-day air.

I am guessing that there are software gremlins related to the Victron VRM "soft-switches", where if you turn off the inverter using the soft-switch, then physically turn it off, it can have trouble coming back. There are various posts on the internet about this, but typically fully disconnecting from the cerbo will resolve them. That didn't resolve it for me. Maybe it needed to be disconnected for a longer period of time?

On the Progressive Automation lifting column:

Custom Support with Progressive Automations.com has been very challenging. They appear to use a call-center in Manila for answering the phones. The people answering the phones are not empowered to process RMA requests. Each phone call, if I was lucky enough to have it answered, ended with "someone will call you back", which never happened. I placed follow-up calls, and follow-up emails 3 times each on Monday, Tuesday, and today is Wednesday. Last night I started messaging on Twitter and also LinkedIn, and did get responses via LinkedIn, from someone who authorized the RMA. I now have a shipping label. I'm hoping it actually ships today.
 
#48 ·
A few updates:

On my Multiplus RMA:

I've learned my Multiplus is now on it's way back. The vendor is insisting it's functioning correctly, and suggest the root-cause is me not turning it on properly. While that's ridiculous, I'll be happy to have it back. They kindly sent it for next-day air.

I am guessing that there are software gremlins related to the Victron VRM "soft-switches", where if you turn off the inverter using the soft-switch, then physically turn it off, it can have trouble coming back. There are various posts on the internet about this, but typically fully disconnecting from the cerbo will resolve them. That didn't resolve it for me. Maybe it needed to be disconnected for a longer period of time?
Sorry to hear about the Victron issues slowing down your great progress. Your battery build is awesome. We continue to enjoy the Rize bed — makes watching a movie in the evening vey comfortable.

When I was bringing up my MP, I experimented with manual control of the DVCC (it is force on since I’m using the Victron BMS with their batteries

For debugging, you might want to configure the Multiplus (I had to use the dongle, but you can probably use the Victron Connect app since you have the MPII) as if you have a dumb battery. For this test, disconnect your SmartSolar controller as well so that you only have the Multiplus and batteries — no Cerbo or SmartSolar. The inverter should turn-on with the physical switch (if it is really working) If that works, then add back the Cerbo and see if the Multiplus turns off. If so, check the Cerbo’s logical inverter switch. If you get to this point, then try to add-back the SmartSolar (Still without DVCC). Hopefully, you can verify that all the blue boxes are functional, then focus your efforts on the battery comms and DVCC.

@gregoryx might also have some debugging ideas as he has experimented with DVCC as well.

Good luck and thanks for the great doc on your build.
 
#50 ·
SmartVan 1.0

I am a Smarthome fanatic, so there is no question I would also add SmartVan functionality. However, right now I'm on a deadline, I need a functional van in two weeks. I need to prioritize.

MVV - Minimal Viable Van is the idea here. We have our first big roadtrip coming up shortly. We need good internet while traveling, including Canada. Also, you can't have a SmartVan without internet, so...

1. Starlink Mini goes on the roof. However, I have 1000 watts of PV on the roof, there's not a ton of space up there. Cue the 'starlink cage'. The Unaka rack has a solid piece of 15-series 8020 behind the rear panels. I used this to form one-edge of a square, then added more 15-series aluminum to make a box. Inside the box I used 80/20 Starlink mount from Striker Fabrication to hold the Starlink mini. That is a lot of weight to hang off the side of an 80/20, bumps and g's will torque the connectors, so I added a second piece of 15-series aluminum to hold onto the cage and stableize it. It works pretty well.

I expected I would need to add a bumper to keep the starlink from bouncing off the rear tail-light, but it feels secure-enough without it.

Bonus: An awesome spot to mount a Wolfbox camera.

Image
Image


I am seeing very low idle data consumption from the Starlink. The BMS is reporting about 13 watts of consumption overnight, and that includes the Multiplus 2 being turned on.

The next step is HomeAssistant.

As an interim 1.0 MVV approach, I am using the existing HomeAssistant platform I have in my home.

1. There is a Work-In-Progress FordPass integration available here: GitHub - marq24/ha-fordpass: Fordpass integration for Home Assistant [fork optimized for EV's & EVCC] - it works well, and brings all the Ford Pass data-elements into HomeAssistant.
2. Then I needed the Victron Data. The Cerbo GX is connected to Starlink, but that's a different network than I have at home, so I need a way for my residential HomeAssistnat to talk to the Cerbo GX. Enter "Tailscale GX". This is a build of Tailscale that runs natively on the CerboGX. Tailscale is a simple-to-use VPN which allows different machines around the globe to appear to be on the same virtual network. Typically it gets installed on a Linux machine, or a Router somewhere.... but I haven't bought any of that stuff yet for the van. So I installed it on the Cerbo GX. Easy Peazy. GitHub - kwindrem/TailscaleGX: tailscale for Victron Energy GX devices

Add-in the usual MQTT magic, and we have SmartVan 1.0.

Image
 
#51 ·
...
The BMS is reporting about 13 watts of consumption overnight, and that includes the Multiplus 2 being turned on.
FWIW, this is almost certainly wrong. Even if you're in search mode, the MP2 still pulls a few watts. And the Starlnk pulls more than that, most likely - though it CAN go that low in perfect conditions.

Assuming you're using the Starlink in DC-mode, the issue there is that it's calculated, not metered. And for whatever stupid reason, the calculated stuff doesn't take into account the MP's background draw - flat-out pretends it isn't there, basically. I've added it back in, mathematically, at times... but it's more hassle than it's worth.

Victron confirms that the only way to get accurate DC draw is to have a SECOND Smart Shunt dedicated to DC loads. 🤷‍♀️


...
Enter "Tailscale GX".
....
Thanks for that! I had debated trying to roll it in there myself; this is excellent!


Curious what you plan to run the van's Van Assistant on? RPI? Or some other SFF?
 
#52 ·
FWIW, this is almost certainly wrong. Even if you're in search mode, the MP2 still pulls a few watts. And the Starlnk pulls more than that, most likely - though it CAN go that low in perfect conditions.
This is coming off the BMS at night, when there's no solar. I assume there's error, but the Internet tells me this BMS typically reports high, not low... Regardless, power consumption seems to be a rounding error when there's not a lot of load. I've been letting it run to let the mqtt data flow, I'm seeing %98 SOC in the morning. Very happy.


Victron confirms that the only way to get accurate DC draw is to have a SECOND Smart Shunt dedicated to DC loads. 🤷‍♀️
I do have one in the wiring plan, I'll add it eventually.

Thanks for that! I had debated trying to roll it in there myself; this is excellent!


Curious what you plan to run the van's Van Assistant on? RPI? Or some other SFF?
The one issue with tailscalegx is they have not exposed subnet routing in the UI. I'm sure that's solvable.

I'm thinking a small nuc for van assistant. I run proxmox on a big nuc at home, but I think I'll skip pve and run haos directly on the nuc, using add -ons instead of rolling my own again. I have to much to do without all the sysadmin work.
 
#53 ·
Man... if you have the ability (which you do), I would NOT run Home Assistant native; the add-ons are a joke - all the containers with no management. Maybe there's some command-line options one can add-on as well? There weren't when I first tried it a couple years ago and that means simply un-managed containers. If you only run Mosquitto, for example, probably fine; but if you run anything with storage needs, it can grow out of control with no way to see or manage it. I was playing with Influx/Grafana and it magically ate space - similar with Plex and Jellyfin. Hard to say what else is problematic; but I think they should have just made a GUI wrapper for containers rather than repackaging them and offering no management.

Sounds like the overall power-draw is plenty low, which is awesome! All I was saying on the monitoring side is that the Victron system estimates DC draw, so ALL DC-draw numbers are inaccurate; and, generally, if you combine the AC and DC numbers, they are missing additional draw (from the Multiplus) that IS reflected in the total shunt, of course. Just a little weird and messy since the primary culprit of the inaccuracy is the failure to include the overhead of the Multiplus.
 
#54 ·
Man... if you have the ability (which you do), I would NOT run Home Assistant native; the add-ons are a joke - all the containers with no management. Maybe there's some command-line options one can add-on as well? There weren't when I first tried it a couple years ago and that means simply un-managed containers. If you only run Mosquitto, for example, probably fine; but if you run anything with storage needs, it can grow out of control with no way to see or manage it. I was playing with Influx/Grafana and it magically ate space - similar with Plex and Jellyfin. Hard to say what else is problematic; but I think they should have just made a GUI wrapper for containers rather than repackaging them and offering no management.

Sounds like the overall power-draw is plenty low, which is awesome! All I was saying on the monitoring side is that the Victron system estimates DC draw, so ALL DC-draw numbers are inaccurate; and, generally, if you combine the AC and DC numbers, they are missing additional draw (from the Multiplus) that IS reflected in the total shunt, of course. Just a little weird and messy since the primary culprit of the inaccuracy is the failure to include the overhead of the Multiplus.
I'm pretty happy with the addons. I also have a VM just for docker running under PVE, but I find i gravitate to the addons. I like I can set them to auto update and forget about them. There's a handful that misbehave, studio code server will take over the cpu every few months, and yes- I do host the database as native vms on pve... I don't think I'll need dbs on the van.

I actually spent the better part of two years running a container infosec program for BigConsulting.
 
#55 ·
I am running out of time for our first trip!

When I pitched this build idea to my wife, I built a fairly detailed project plan where I took 3 months to get to 1.0.

The way things turned out, with all the delays from the Transit Trail snafu, then ordering the second van, well - I picked it up the second week in May, and we have our first trip planned the second week of July. So that gave me two months to get something functional. BTW: The second week of July is next weekend.

Seat 4: Yep, done.
Sleep 4: Partially complete. I've built one bed, a very fancy bed that goes up and down, and uses an adjustable bed base so it can be used as a sofa. The kids will get an air-mattress in the garage.
Air-Conditioning for southern climates: This was an early scope cut. Our trip is to go up-north, so I decided to skip on air-conditioning for now. Update: Kid #1 has a hockey tournament in Orlando this weekend. We still don't have air-conditioning, so we'll spend the 1st weekend in a hotel. You can't camp in Orlando in July without air-conditioning.
Feed 4: Big fridge, partially complete, details below.
Feed 4: Water system: not yet in scope, we'll bring a big jug of water, and we have a big fridge.
Feed 4: Induction cooktop will be functional, no microwave (yet). I expect we'll make our own breakfast & luch, then eat out for dinner.

Insulation: I decided to skip since we were going north, then we decided to go to Orland, but in this case, we were able to get Insulation done. Yes, in hindsight, insulation should've gone in before flooring, seats, beds.... but the plan was to go north. Until we decided to go south. Dear Wife tackled the insulation. Thinsulate 600L, with Weldwood HHR, applied via the Harbor Freight sprayer. We left a few windows uninsulated to simply future window upgrades. We did not fill any of the pillars... I may do that in the future, we'll see how it does in the Florida sun without it. I'm happy to say that somehow the Weldwood HHR did not end up anywhere it wasn't supposed to be.

Image


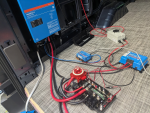
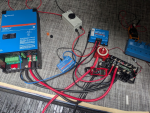
Meanwhile, I tried to make our electrical system "complete". Or, at least safe. It is not nearly as clean as I'd like, but it'll do for now. Most cables can be shorter, one can be longer. The black battery box is elevated 3 inches so it can partially sit over the back of the wheel well. Some day there will be a pullout drawer for electronics underneath.

Battery box is bolted through the 8020, and then 1/2 in ply. It is both secured to the Birch using t-nuts, and also through the ply into the wall with Rivnuts. Together there are 10 bolts holding it in-place. It really does need some edge-banding... It will get a complete teardown, inspection, & rebuild after this trip.

Image


I opened up the drivers seat, found the Ford Interface C33-E and added pigtails.

Pin # 6 (ignition) I passed through and exposed, to control the Wolfbox
I added an automotive relay, used Pin #6 (ignition) and pin 2 (engine run), which together will activate the relay. I took the relay output, added a push-button switch inline. That circuit will activate the B2B charger. (future install).

I'm currently test running starlink+fridge+freezer to monitor energy consumption to see if I will need the B2B charger. I may just bring tools & parts on the road-trip as backup if the solar alone can't handle it. I may add it late thursday night. we'll see.

I added a second push button switch which enables SRC - Smart Regen Charging, aka Third Party High Power Mode. This switch is connected to Pin 3 (SRC Inhibit), and Pin 1 (ground).

I can't test TPHPM as I don't have forscan setup yet. The light on the switch works....? I did not see a change in RPM.

Note: The seat podium steel is quite strong. Lots of drilling.

Image
Image


Lastly... there's the Fridge.

Isotherm 195. My plan was to build a cage out of 10-series 8020, and use the fridge trim ring to screw into the 8020. But, the 1-inch extrusions are just a bit too wide to work well there, so I grabbed some 2020 Extrusions that I had from a previous project, and it fit perfectly. The problem is that I don' t have any 20-series hardware. So I've got that ordered from McMaster, delivery tomorrow. In the meantime, my fridge is "installed". Ratchet-straps FTW. I hope to get that addressed before I leave, we'll see.

Image


I'm quite happy with that fridge, not-so-much with the install. It's basically an Isotherm CR130bolted on-top of a CR63 freezer. Each has its own control system and compressor. Each has it's own power cords & wiring, so I can turn each on and off independently. Running just the freezer is 40 watts, and just the fridge is 60 watts. Ice-cream and popsicles will be HARD.
 
#56 ·
FYI, It's now 24 hrs since I plugged in the fridge/freezer. The Battery SOC dropped from 91 to 77% overnight, and is up to 93% right now, and I had morning shade. I am powering the fridge, freezer, Cerbo, & Starlink currently. Victron reports 2.32kwh consumption over the last 24 hrs. With the Georgia heat/haze, I am seeing max 700 watts of solar from the 1,000 watt array.

It's good to know the fridge/freezer isn't killing the battery. Once we start living in it, we'll consume more power though.
 
#58 ·
...
It's good to know the fridge/freezer isn't killing the battery. Once we start living in it, we'll consume more power though.
Possible good news: I've seen lower energy drain when the freezer is FULL than empty. I assume similar for the fridge; but the overall draw for the fridge is so low anyway...
 
#59 ·
Don’t forget a tiny fridge fan works wonders as well. One with a switch is handy.

 
#61 ·
The little fridge fan made a huge difference in my last 2 trailers. Mellows out the cold vs. warmer spots into a more single temp environment. That way it's less touchy what you put on each shelf (i.e. less accidentally frozen eggs if they're on top near the freezer).

Doubt it does much for energy use, but makes the fridge much more like your large home fridge in usability.
 
#64 · (Edited)
Here's a few during my first real road trip.

Driving 80mph I'm getting 14.0 mpg after 500 miles

I stopped at acat scale and weighed in with 4 passengers, full fuel, full load of camping supplies :8620lb.

Not included, the water system I haven't built yet, cabinets I haven't built yet, and the second bed I haven't built yet.

Overall I'm happy that I still have almost 1,000 lbs left, but I have a 30 gallon water tank, so that alone will take 250 lbs. Weight is gonna be tight.

The Ford air conditioning is barely keeping up in the Florida heat, even with the thinsulate insulation we added, and the roof being covered in pv. Installing the undermountac will be as priority even I get home.

We're getting some wind noise from the front roof area. I'm now going to go see if I can tighten up the unaka fairing.

1,000 pv is typically producing 700 watts, and it's easily covering the fridge, freezer, and starlink.
 
#66 ·
The wind noise around the door edges is annoying for sure - especially noticeable in a cross wind on the leeward door as it gets pulled out a little with gusts. I have 2 rolls of varying sized weatherstripping to try to improve that at some point.

Are you confident the wind noise is the rack fairing and not the door seals? I never hear anything from my Unaka rack.
 
#67 ·
Doesn't the top unit of the Isotherm 195 have a built in fan? I've got the Isotherm 130 Drink, which is basically the Cruise 130 without the freezer, and they've added a fan. From the pictures it looks like the 195 uses the 130 Drink
It does have a fan, but filled with soda cans I'm still seeing it's warmer up to than i'd like, right now 50 degrees f on the top shelf. I haven't measured the bottom yet. Maybe more to come on this one
The wind noise around the door edges is annoying for sure - especially noticeable in a cross wind on the leeward door as it gets pulled out a little with gusts. I have 2 rolls of varying sized weatherstripping to try to improve that at some point.

Are you confident the wind noise is the rack fairing and not the door seals? I never hear anything from my Unaka rack.
Yeah, definitely some whistling noises that consistently show up over 70mph. I will try some adjustments when I can get some downtime.
 
#71 · (Edited)
It's definitely a problem when the freezer ices up after a few days and you can't rely on your fridge to keep meat, fish, dairy, etc., and other items food safe. And yes, I also had to use the coldest setting on the POS, just to get warm temperatures in the fridge (can you tell how much I hate it?) I can rely on the Dometic cooler to keep everything food safe, not so much with the Isotherm. Not having to listen to the compressor constantly, and the compressor being much quieter, it's a huge upgrade.
 
#72 ·
You are finding what I found. Isotherm fridges are overrated POSs.
I hope I didn't give that impression, because actually I'm quite happy with it. The combination Isotherm 195 is great. Having a separate Freezer is rock-solid, it keeps frozen things very frozen and the fridge maintains an adequately cool temperature while consuming very little power.

You're comparing it to your Dometic cooler is misguided - I do not want a cooler, I wanted a fridge with separate freezer. I'm glad you're happy with yours, though.

I really like that they run on separate compressors, I can power the freezer off if it's not needed.

It's definitely a problem when the freezer ices up after a few days and you can't rely on your fridge to keep meat, fish, dairy, etc., and other items food safe. I can rely on the Dometic cooler to keep everything cool, not so much with the Isotherm.
I haven't had any problems with icing up.

I do think they've optimized for low power consumption in a big fridge, which is a reasonable design objective.
 
#74 ·
Trip Report:

Here's the outcome of my first "prooving" road trip.

Biggest Oops: Dead-shorting my 8.4kwh battery.
Best non-wrench used as a wrench: The die's from a hydraulic crimper used to hold a nut while tightening the bolt.
Biggest fail: VHB tape is worthless.
Miles driven: 3,796
MPG: 13.2
Cost of Fuel: $590

3,796 miles, from Atlanta south to Orlando, then north up past Toronto, then back to Orlando. Average fuel economy: 13.2mpg, fuel cost: 590.

Before leaving, I safely installed the Isotherm 195. Screwed through the floor & strapped to the wall.

Family approval factor: HIGH. Spousal approval factor: High. Improvements needed: Yes.

Seat 4: Highly effective. Kids had zero complaints about the JMG seats during the 12 hour drive.
Sleep 4: In Process. The parents were very comfortable on the lift-bed. The zero-gravity adjustable frame was pleasant. The kids were on an air-mattress in the garage.

Having the kids sleeping in the garage meant we had to constantly juggle moving the luggage from the garage to the front of the van at bed-time, then back to the garage in the morning. That was a total PITA. We also ratchet-strapped all of our camping chairs, foldable tables, up-front, which seriously cut-in to our cabin space.

The family has prioritized the following enhancements:

1. Installation of a fixed window in the forward position behind the driver for Kid #1. Ordered today.
2. Installation of the UndermountAC that's been in my dining-room for a few months
3. Build the 2nd bed.

So... about that 'dead short' thing.

Getting the van ready for this trip was a lot of work, and certainly corners were cut. The second bed, air-conditioning, and most importantly - alternator charging.

I have a large battery (8kwh), a large solar array (1000w), but no alternator charging when I left the house. I did have a large "project box" in the van, and that included everything I needed for alternator charging.

On the electrical loads, I had : Fridge, Freezer, Starlink, Cerbo GX. The solar-system was more than able to power those at night, then recharge during the day. The lowest I saw my battery SOC was %52.... Right up until we started camping under dense very tall trees in the second week of the trip. Solar performance went to near zero while camping. We did a few car-trips, like groceries in town, the panels would recharge, but the SOC was overall trending the wrong way. We planned a beach day, hoping to park in the sun and recharge for the full day, but the trees didn't co-operate, and we still had shade. I knew we would run out of energy that night, and I use a CPAP, so that's not an option.

I spent the afternoon working on wiring up the Sterling 24V 120A b2b charger. I didn't get quite done by the time beach-time was over, then it was late and had to cook dinner, and it was too late to start a fire, so I ended up cooking with the induction stove, which took the SOC even lower.... The end result of all of this is me, after dinner, in the mostly dark, lieing down in the garage finishing the B2B charger install, connecting the Sterling to the Lynx Distributor. Forgetting to turn off the battery, using a non-insulated ratchet on the Distributor, and while bolting down the negative bus-bar, I contacted the positive bus-bar.

I jummped back, .... and ..... nothing else happened. No drama. No pop, no spark, no smoke, no fire. The next thing I said was "how the **** did I not blow that fuse (t-class)" ? I heard the inverter click back on. Then I opened up my BMS app and saw:

9:48:23pm:Discharge short circuit protection
9:48:27pm: Discharge short circuit protection released.

The BMS had completely snuffed-out a dead-short of a 314 AH 24V battery. I am impressed, and in-debt.

One other challenge we had along the way:

I had previously mentioned the Unaka Rack seemed noisy. It took a few tries to get this nailed down. I had thought the problem was a 1-inch gap between their fairing and the start of my panels, which was creating a whistling like noise above 75mph. So I end up on the ladder moving panels around. But while I'm up there, I notice the bolts holding the panels to the unaka cross-bars are loose. And on one test-run I actually heard the panels vibrating above 60mph. That ended with a very slow trip home. So, it took 4 tries? Ultimately I moved all the panels twice, and completely unmounted them, tightened the cross-bars, remounted them... by myself, on a high-roof transit, while camping. And didn't solve the problem. Apparently the gap wasn't causing a whistle. Instead the fairing was vibrating, and instead needed to be adjusted downwards with some tension. That seemed to fix most of it. There's still some noise above 80mph, but I think it's probably unreasonable to expect no noise at all at that speed? Anyways, future enhancements will include more noise insulation up-front, right now I don't have any.

So the Unaka rack is fine, but the nylocks they used to secure the panels to the cross-beams are completely insufficient. That may be due to the temperature swings of 105(f) (florida) to 55(f) in one day. Who knows, but that will be a constant maintenance item until I can swap out better hardware.

And this was where I used the die's from the hydraulic crimper to hold a nut while tightening the bolt with the ratchet (while my kids were riding roller coasters). Only the next day did I go buy a set of box-wrenches.

Fun times!
 
#77 ·
Congrats on the trip. The 'killing yourself' effort to get it ready for the trip must have made the trip feel like luxurious free time by comparison.

I'll check my Unaka solar panel cross bars and panels - they've been mounted for 6 months through a lot of temperature swings. I was just up there messing with the Velit AC and didn't notice any looseness.

Is your front fairing the metal version (I think they call it "pro" now vs. the HSLD moniker previously). Is the front of your fairing resting lightly on the forehead of the van with that protective edge gasket? That's how mine is mounted. I don't notice any whistling or noise from my rack at all. But can't comment above 80 mph since I have my Trail safety limiter to protect me :rolleyes:.
 
#79 ·
Is your front fairing the metal version (I think they call it "pro" now vs. the HSLD moniker previously). Is the front of your fairing resting lightly on the forehead of the van with that protective edge gasket? That's how mine is mounted. I don't notice any whistling or noise from my rack at all. But can't comment above 80 mph since I have my Trail safety limiter to protect me :rolleyes:.
Correct, it's the aluminum fairing, rubber gasket on the edge... and yeah, it's a high speed only problem. If it's loosely resting on the forehead, it'll resonate when struck, but if it's tightened down it's a lot quieter.